.png)
Managing Employee Data
Introduction
PerformYard offers a few ways to manage employee data, so you can choose the method that best fits your team's size and workflow. You can upload a CSV file to add or update multiple employees at once, add a single employee manually from the Employees page, or connect an HRIS or SFTP integration to keep employee data synced automatically. This article walks through each option so you can decide which approach works best for your organization.
Managing Employee Data via CSV Upload
PerformYard allows administrators to both create accounts in bulk and edit employee data via CSV upload. CSV upload is available on the Employees tab within Company Settings.

PerformYard recommends using the Download CSV link to download an appropriate template for your user data. This download will include all of your data fields (including your custom fields), so it makes a great place to start. Further, each user's information will already be associated with their email address if you are updating employee data.

PerformYard uses an employee's email address as its unique identifier, therefore email address MUST be a column in your CSV. Where the email address in the CSV is already found in PerformYard, any new data that's imported will update data fields associated with that employee. Where the email address is not found, PerformYard will create a new user account using that email address. This is especially important to remember should your CSV have any typos or email address changes.
To upload a CSV, click Upload CSV on the Controls menu of the Employees list; then click Choose File and select your CSV data file.

PerformYard will attempt to match the column names in your spreadsheet to the available fields for user data. Each column in your CSV file will appear, along with an example using the first employee in your CSV and the matching PerformYard data field. Uncheck a row in this list to not import that data into PerformYard. Use the drop-downs in the PerformYard Property column to select the appropriate data field if the matching was not successful.

Click Upload to finalize your data upload. Once the upload is finished, PerformYard will note any errors that may have occurred.
Please note that importing into certain field types require specificity, including:
- Prior to uploading a CSV, check for spaces in the email and manager field (Find & Replace is an effective method)*
- For fields such as Manager where you are selecting another PerformYard user, please use that employee's email address.
- For single-select data fields, the imported text must exactly match the options available.
- For multi-select data fields, the imported information must include text that matches exactly and multiple options must be separated by a semicolon.
- For date fields, the data must be formatted as MM/DD/YYYY.
*Email address is the unique identifier in PerformYard. If an email address is off by a character (including a space) in your CSV file, that is not an exact match and a new employee account may be created.
Creating an Employee within PerformYard
Creating and managing user accounts in PerformYard is very straightforward. Navigate to your Company Settings and select the Employees link on the left-hand side. Here you'll see a summary of your active employees, their permission level, email address, an indicator if they have been signed in or sent an invitation to sign in, and a gear icon for their settings.
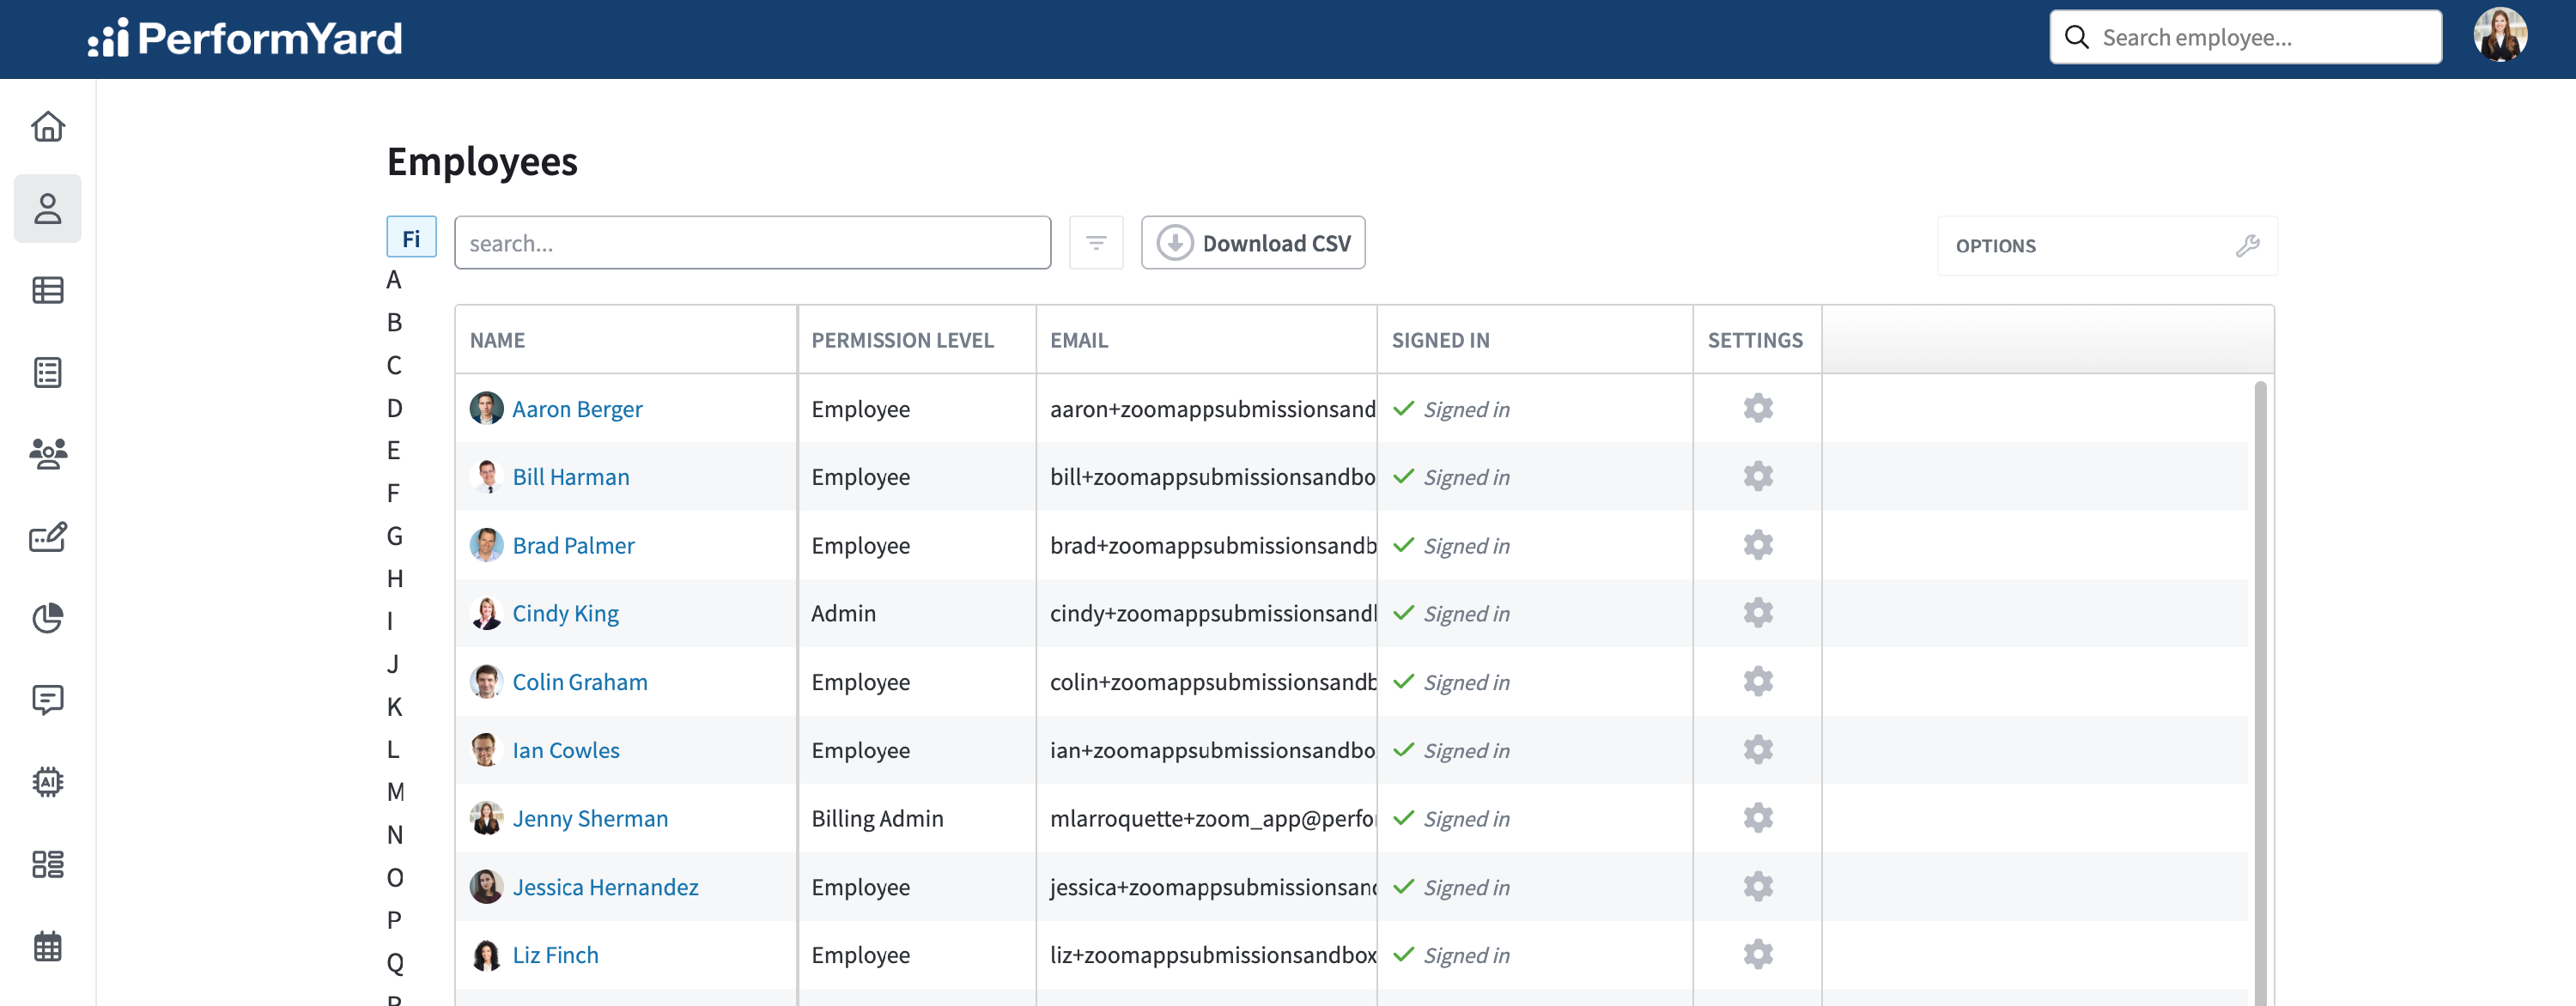
At the top of the page, you have the option to change your sort (First Name or Last Name), a search bar where you can look for an employee and a Filters button that will open a pane with filter options on the left. At the far right, there's also an Options menu.
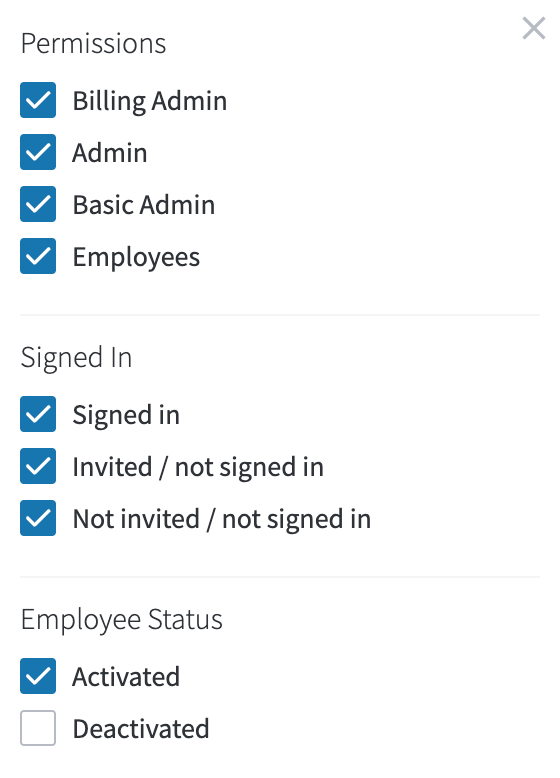
The Filter options include:
- Permissions – display users that have one of the four permission levels
- Signed In – display users based on their sign in status, where you can find just users that have signed in, have been invited but not signed in, or have not been invited
- Employee Status – display users based on their active/deactivated status
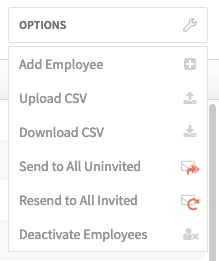
The Options menu includes:
- Add Employee, where you'll create a single new user account
- Upload CSV, where you can add new users and update user data via CSV import
- Download CSV, where you can get an export of all active user information
- Send to All Uninvited, where you can send a PerformYard new user invitation to all users that have not been previously invited
- Resend to All Invited, where you can send a PerformYard new user invitation to all users that have previously been invited but have not yet logged in
- Deactivate Employees, where you can deactivate multiple users at the same time
To add a new user, select Add Employee. Here you'll be able to enter in basic user information to create the user's account. First name, last name and email address are required. Other fields are optional when creating an account.
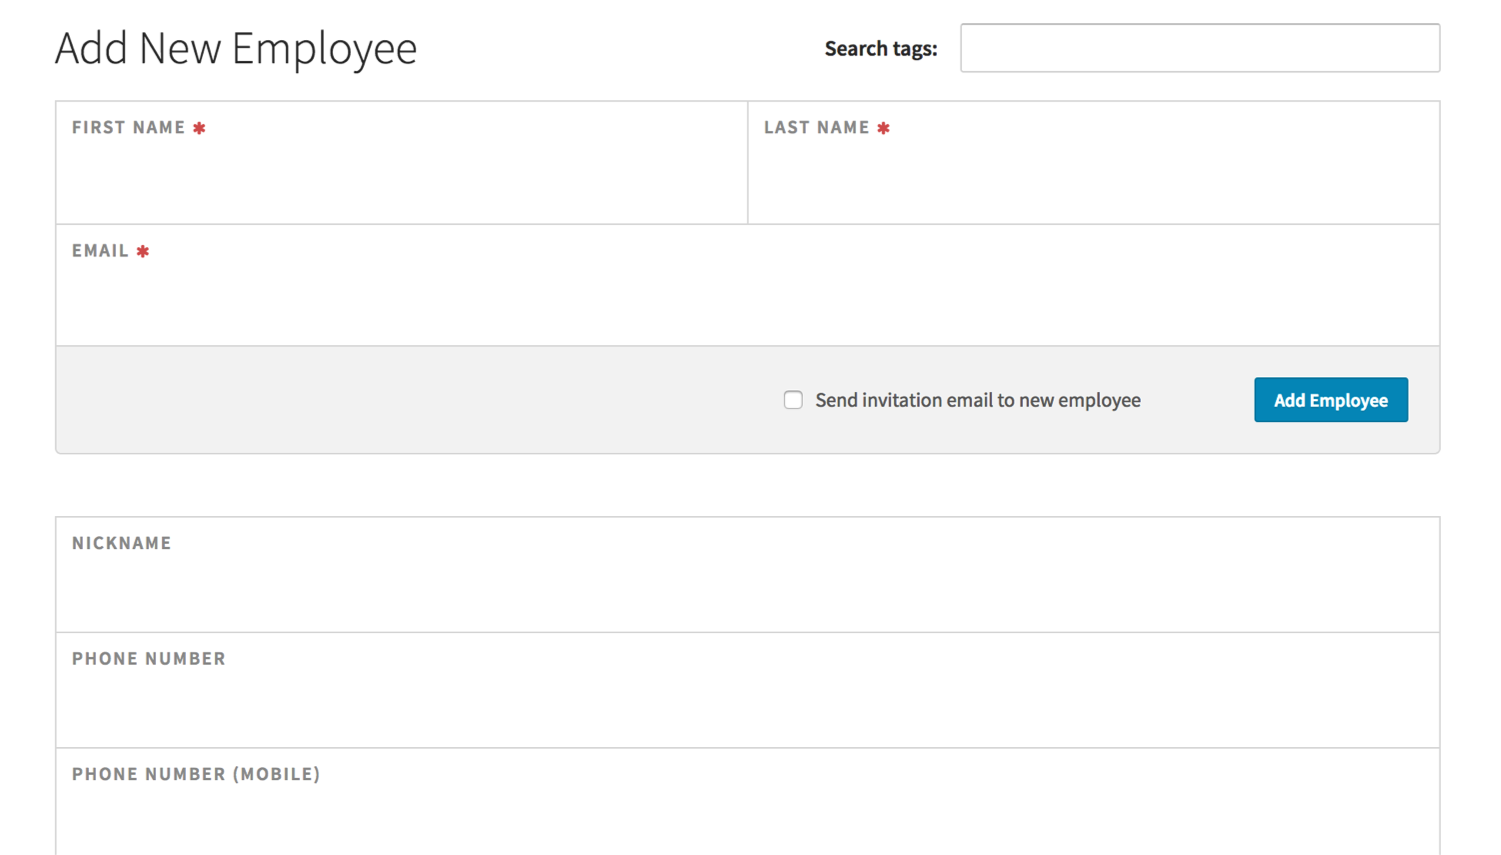
Enter the employee's name and email address. Also select if you want the employee to immediately receive an email to access PerformYard. If you do not immediately send the invitation, you will be able to do so using the gear icon on the right hand side of the employee list.
You can manage any user's information by clicking on that person's name, where you'll be taken to their Details page. Click Edit Employee to update any data fields. You can also click any field name on the Details page to see a history of that field.
To deactivate an account, edit that employee's details and click Deactivate Employee. You can re-activate any user by finding them in the list of employees (use the Filters button to include employees with the status of Deactivated, click Update, and close the filter slideout), clicking on their name and selecting Reactivate Employee.
The Gear icon to the right on an employee's line in the table includes options to invite the user if they have not already been invited to log in and change their permission level using the dropdown selector.
If a user has not been invited, there will be an option to Send Invite, which will email the user the invitation to log in. Once someone has been invited, that will become an option to Resend Invite. Once a user has logged in, those options will disappear.
For more information on sending and resending invitations, click here.
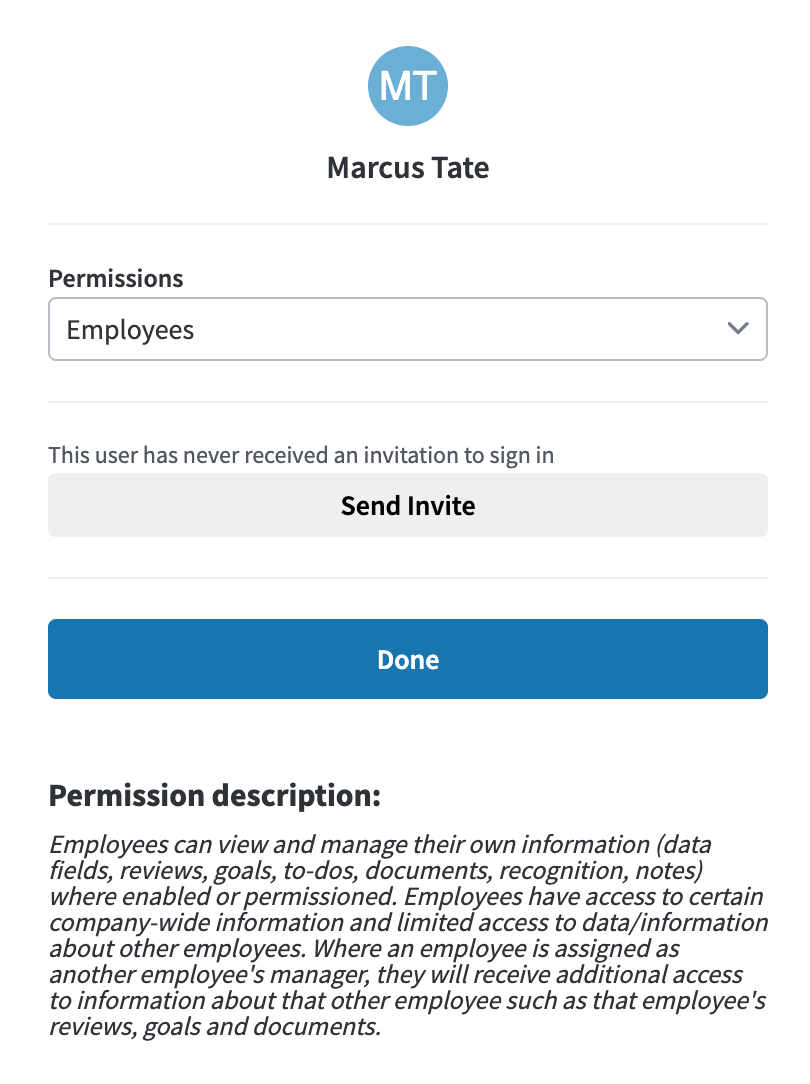
Administrators can change permission levels for others, only up to matching the permission level that they have (e.g. an Administrator can make someone else a Basic Administrator or an Administrator, but not a Billing Administrator).
Managing Employee Data via Integrations
Within PerformYard, you can manage employee data through integrations, either by connecting to an HRIS system or setting up an SFTP integration. For more details on these integration types, see the Related Articles section below.