.png)
Employee Access Management
Introduction
As your team grows and changes, PerformYard makes it easy to keep employee access up to date. This article covers how to invite new users individually or in bulk, resend invitations to employees who haven't yet logged in, and deactivate employees, whether one at a time or in bulk, so your account always reflects your current team.
Sending Invites in Bulk
If you have a group of new users or are launching the platform for the first time, you can send invitations to everyone who hasn't been invited yet with just a few clicks.
- Open Company Settings and select the Employees tab.
- On the right side of the screen, click the Options menu.
- Select Send to All Uninvited from the dropdown.
- A prompt will appear; click the green check mark to confirm and send the invitation emails.

Note: This will only send emails to users who have not previously received an invitation.
Resending Invites in Bulk
If you have employees who were invited but haven't logged in yet, you can send them a reminder.
- Go to the Employees tab within Company Settings.
- Click the Options menu on the right.
- Click Resend to All Invited.

Tip: You can see who has logged in by looking at the Signed In column in your employee list.
Managing Individual Invites
Sometimes you only need to invite or remind one specific person.
To Send an Initial Individual Invite:
- Go to the Employees tab within Company Settings.
- Find the employee and click the gear icon next to their name.
- Click Send Invite.

To Resend an Individual Invite:
- Find the employee in the Employees tab.
- Click the gear icon next to their name.
- Click Resend Invite.
Bulk Deactivation
In addition to the employee-by-employee method to deactivate users, PerformYard allows administrators to deactivate multiple employees at one time. From the employee list, find Deactivate Employees under the Options menu to get started.

On the Deactivate Employees page, begin to check the box to the left of the employee(s) you wish to deactivate.

In addition to selecting users individually, you may use the Groups option to select all employees that are members of a group in PerformYard.

Once you have selected at least one employee, the Deactivate button will turn red along with a count of the number of users to be deactivated. You may page through all of your users or search to find individuals by name.

Click Deactivate once you have selected your users. At the prompt, determine the date for each employee's termination date. All employees deactivated at the same time will receive this termination date. Click Deactivate again to begin the process of deactivating all selected users. Once done, you will be redirected back to the Employee list page.

Please note that if a termination date has already been entered for any employee, that date will remain unchanged and the selected date will not overwrite the existing one.
Another item to keep in mind is that using a future termination date will not schedule an employee's termination action to take place on that date. PerformYard will still immediately deactivate the user and apply the termination date to that employee's information.
If you have a large number of employees to deactivate with various termination dates, you may wish to do an import for those employees to include their termination date. To further streamline that process, you may choose to create a group in which you place all of those users.For example, if you place all users to be terminated into a group called "Terminations" they can then be selected all at once using the Groups selection described above.
Deactivating Individual Users
Sometimes you may only need to deactivate one specific person.
To deactivate a specific person:
- Navigate to Company Settings
- Click Employees in the Company Settings Navigation on the left hand side of your screen
- Find the employee in the list and then click their name
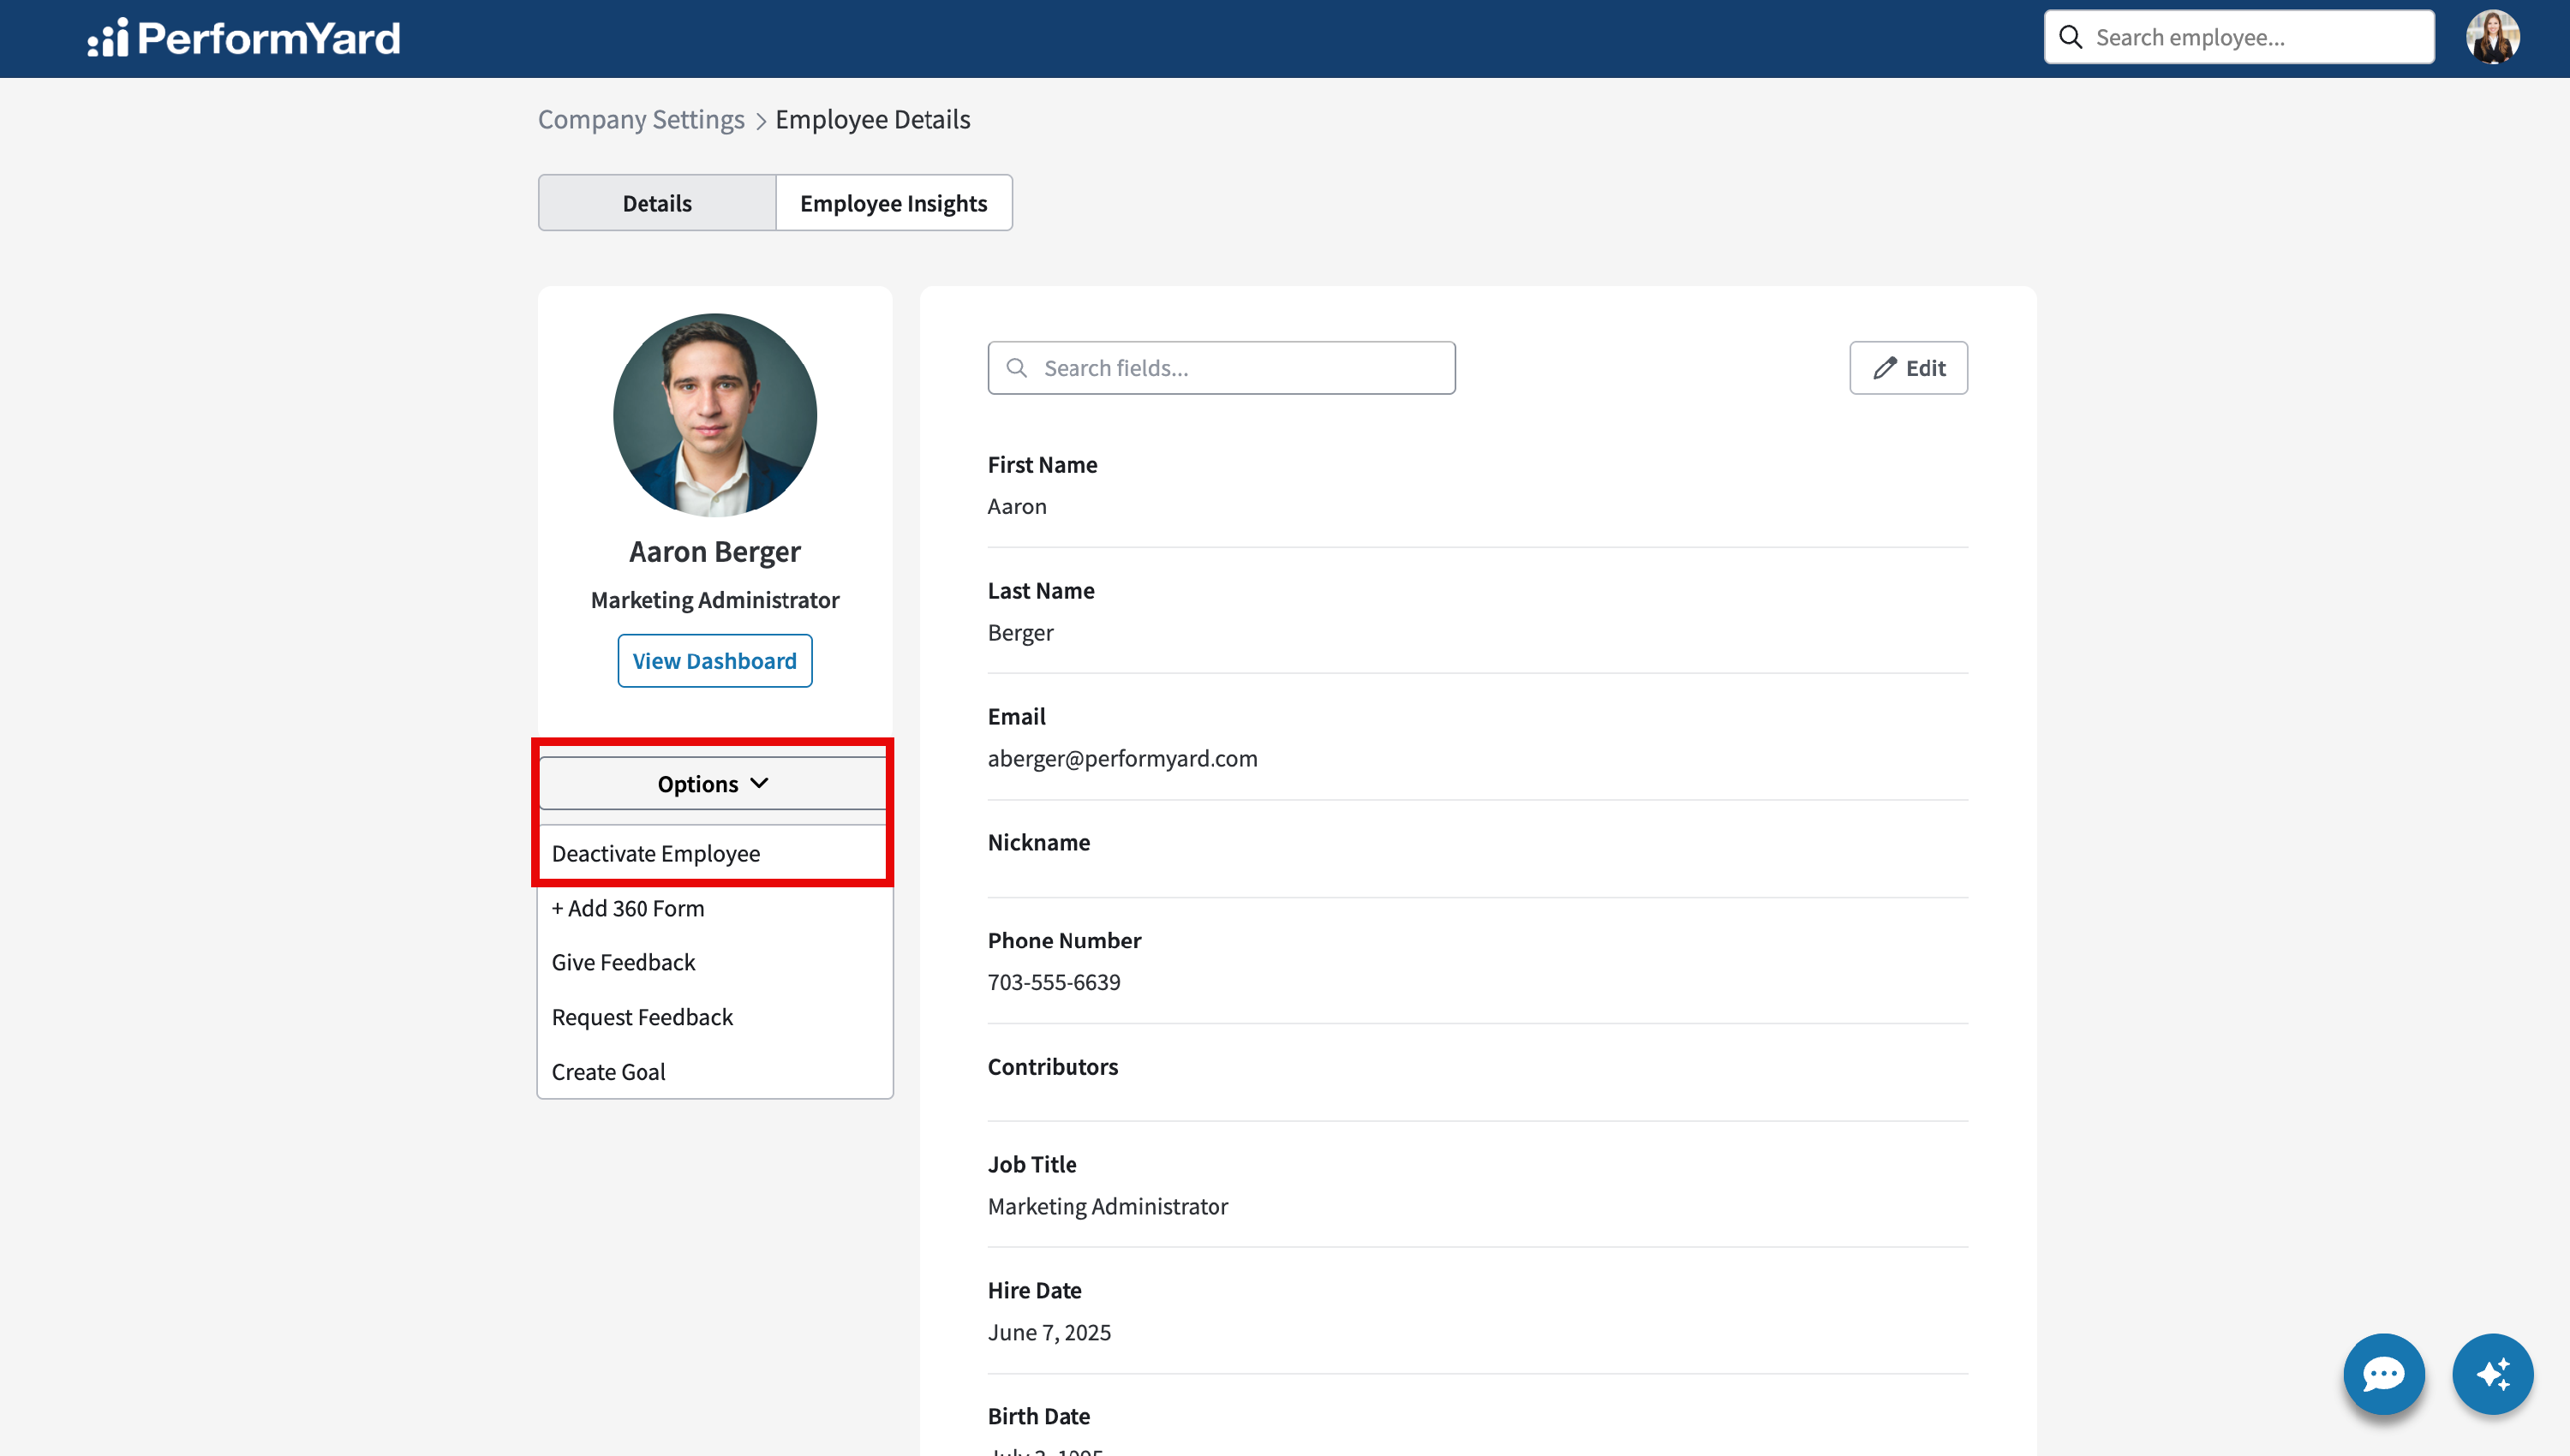
- Click Options underneath their profile picture
- Click Deactivate Employee
Finding Deactivated Users
To see a list of deactivated users:
- Navigate to Company Settings
- Click Employees in the Company Settings Navigation on the left hand side of your screen
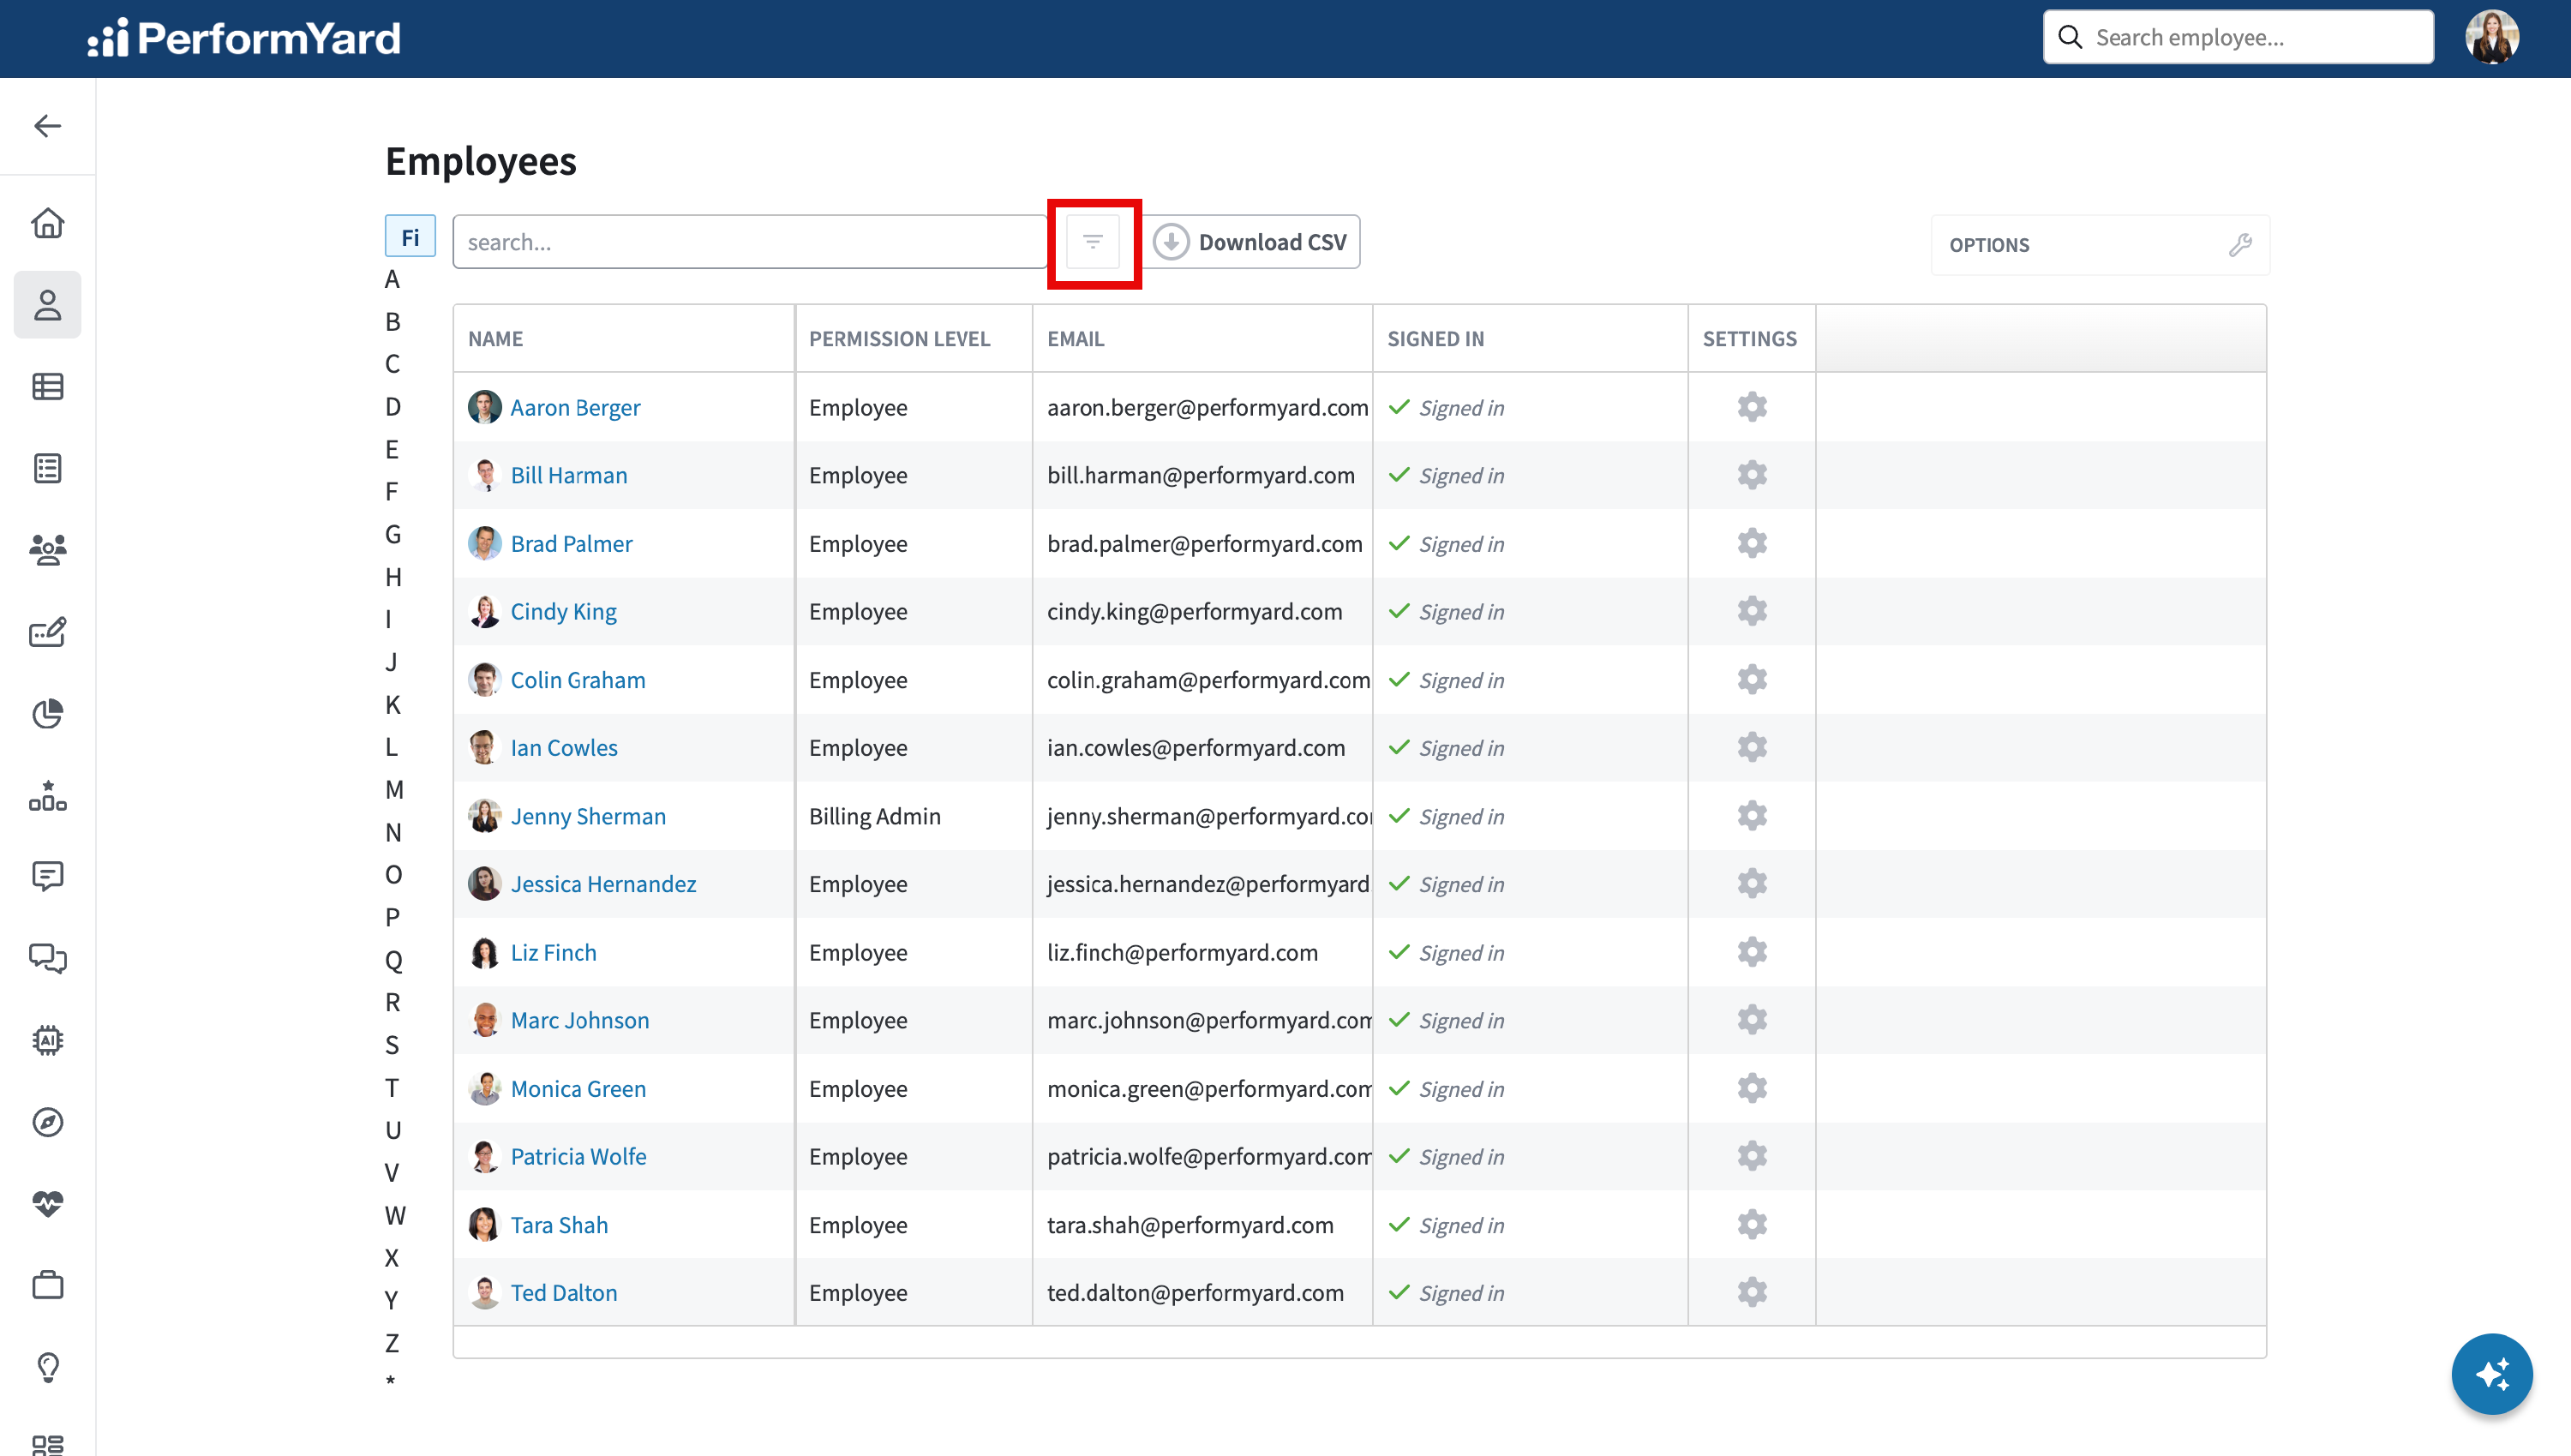
- Click the filter icon at the top of the page
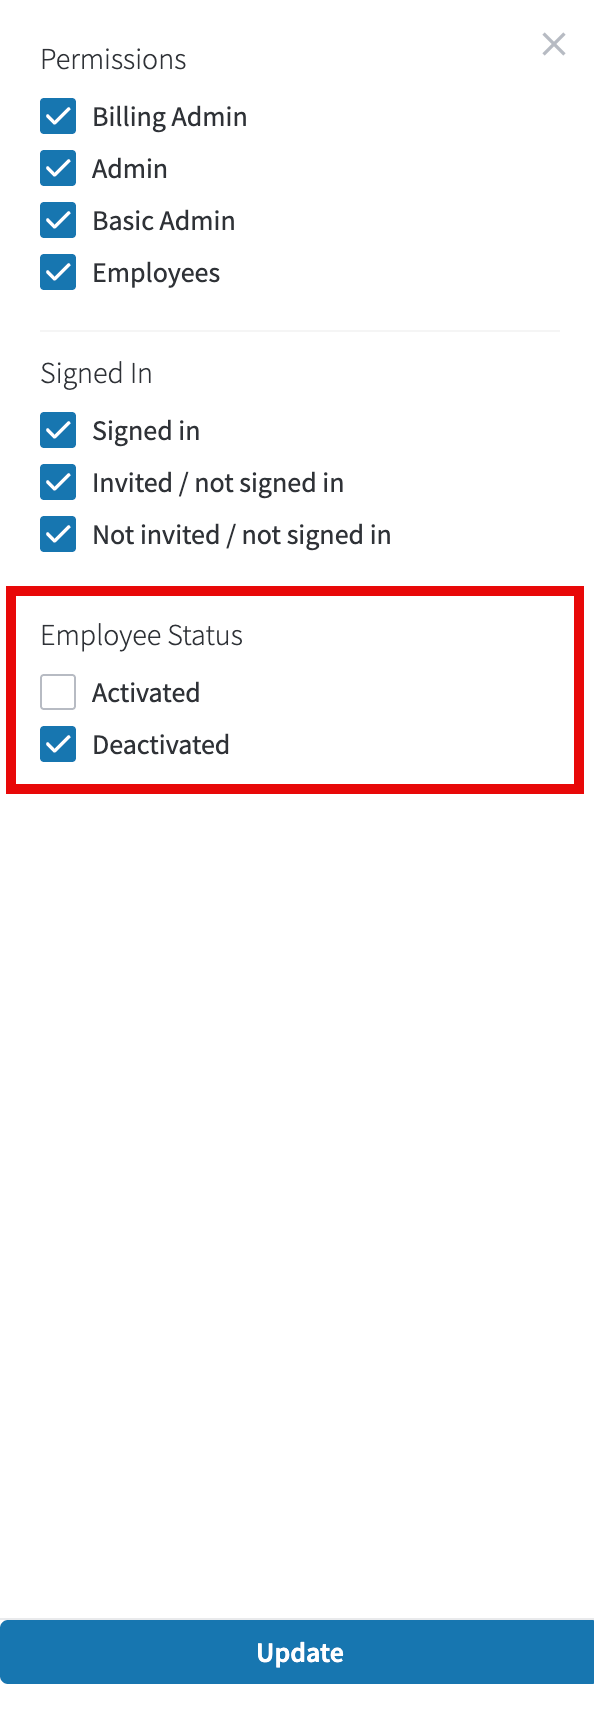
- Under Employee Status, uncheck Activated, select Deactivated, and then click Update