Employee accounts
Creating and managing user accounts in PerformYard is very straightforward. Navigate to the Administration page (gear navigation icon on the top right) and select the Employees link on the left-hand side. Here you'll see a summary of your active employees, their permission level, email address, an indicator if they have been signed in or sent an invitation to sign in, and a gear icon for their settings.

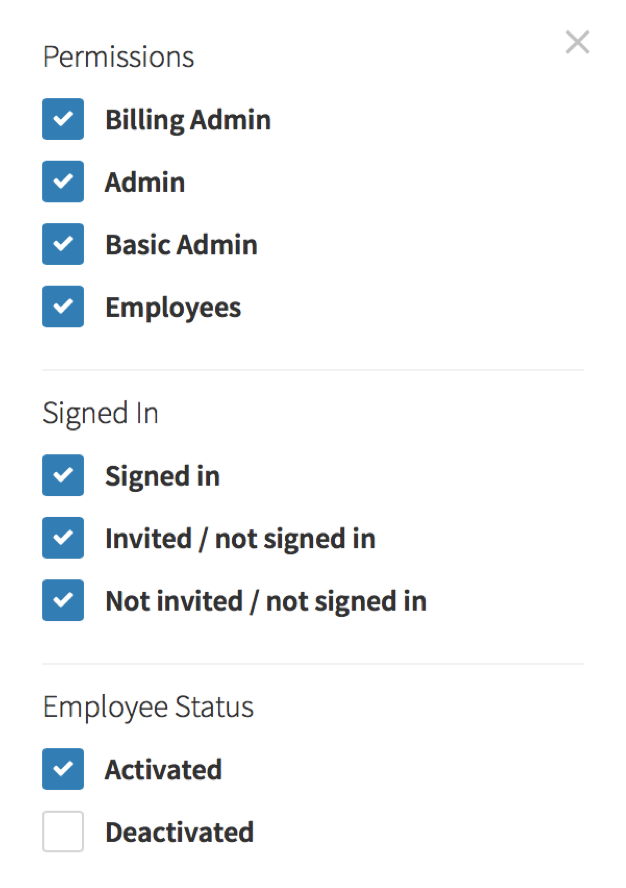
At the top of the page, you have the option to change your sort (First Name or Last Name), a search bar where you can look for an employee and a Filters button that will open a pane with filter options on the left. At the far right, there's also an Options menu.
The Filter options include:
- Permissions – display users that have one of the four permission levels
- Signed In – display users based on their sign in status, where you can find just users that have signed in, have been invited but not signed in, or have not been invited
- Employee Status – display users based on their active/deactivated status
The Options menu includes:
- Add Employee, where you'll create a single new user account
- Upload CSV, where you can add new users and update user data via CSV import
- Download CSV, where you can get an export of all active user information
- Send to All Uninvited, where you can send a PerformYard new user invitation to all users that have not been previously invited
- Resend to All Invited, where you can send a PerformYard new user invitation to all users that have previously been invited but have not yet logged in
- Deactivate Employees, where you can deactivate multiple users at the same time

Video: How to Add a New Employee Individually
Want to add employees in bulk via CSV upload? Click here to see how.
Written Instructions to Add a New User Individually
To add a new user, select Add Employee. Here you'll be able to enter in basic user information to create the user's account. First name, last name and email address are required. Other fields are optional when creating an account.
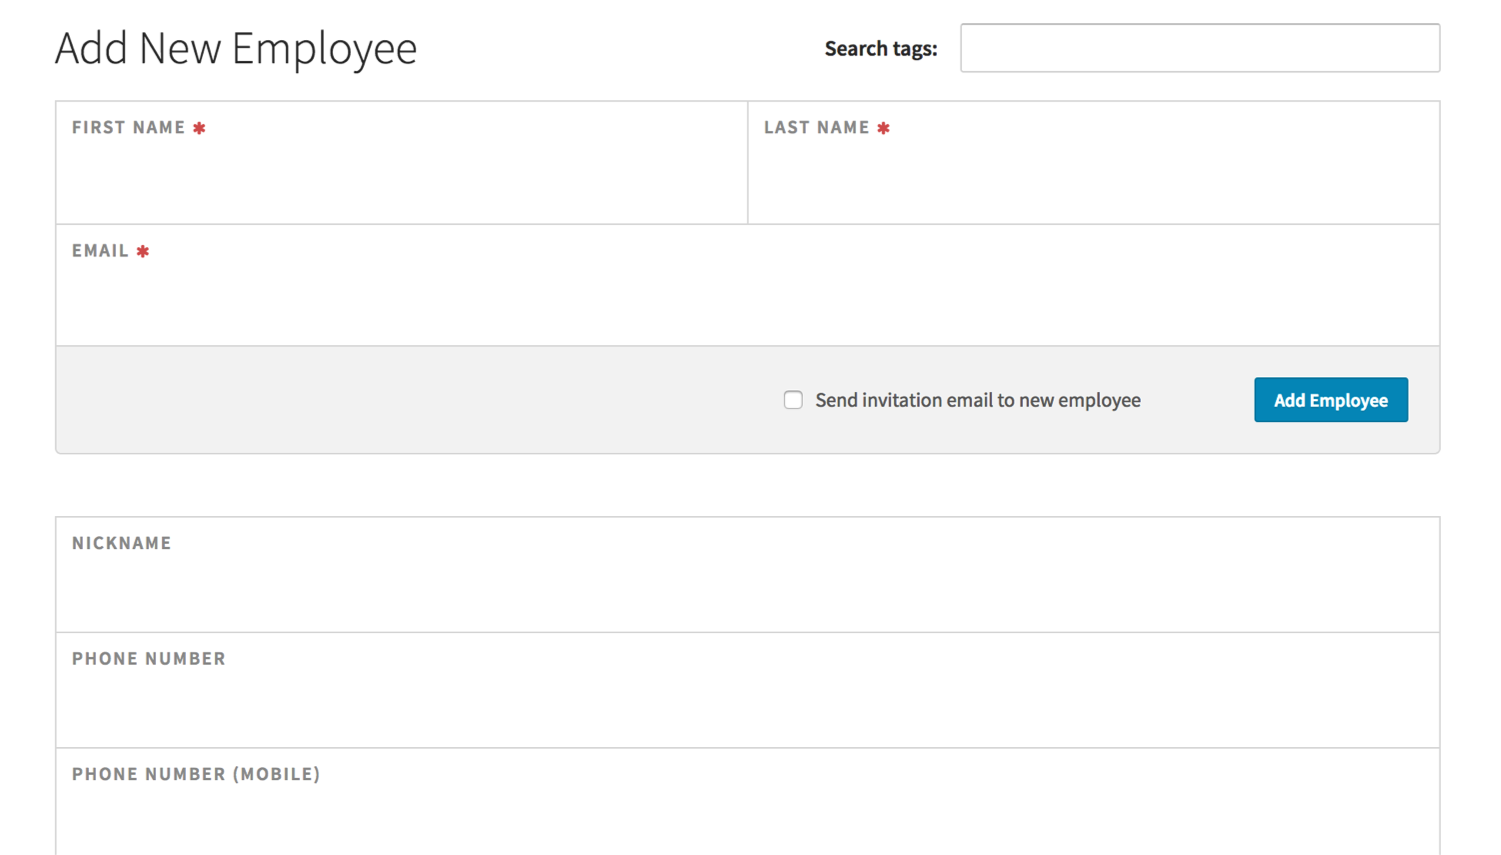
Enter the employee's name and email address. Also select if you want the employee to immediately receive an email to access PerformYard. If you do not immediately send the invitation, you will be able to do so using the gear icon on the right hand side of the employee list.
You can manage any user's information by clicking on that person's name, where you'll be taken to their Details page. Click Edit Employee to update any data fields. You can also click any field name on the Details page to see a history of that field.
To deactivate an account, edit that employee's details and click Deactivate Employee. You can re-activate any user by finding them in the list of employees (use the Filters button to include employees with the status of Deactivated, click Update, and close the filter slideout), clicking on their name and selecting Reactivate Employee.
The Gear icon to the right on an employee's line in the table includes options to invite the user if they have not already been invited to log in and change their permission level using the dropdown selector.
If a user has not been invited, there will be an option to Send Invite, which will email the user the invitation to log in. Once someone has been invited, that will become an option to Resend Invite. Once a user has logged in, those options will disappear.
For more information on sending and resending invitations, click here.
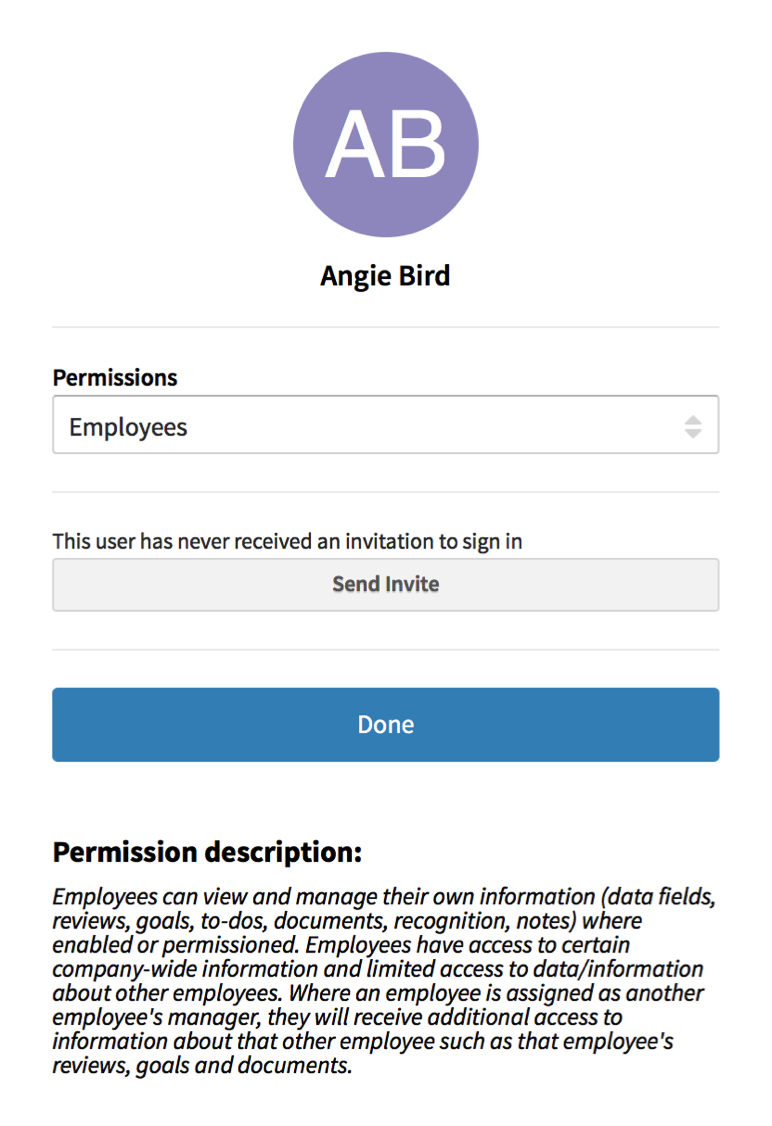
Administrators can change permission levels for others, only up to matching the permission level that they have (e.g. an Administrator can make someone else a Basic Administrator or an Administrator, but not a Billing Administrator).