.png)
Launching a Workflow
Introduction
Once you've built a workflow template, launching it puts the process into action for your employees. This article covers how to launch a workflow, select the employees it applies to, review and adjust to-do assignments, and assign a backup manager when needed — as well as how to monitor progress and manage to-dos after a workflow has been launched.
Launching a Workflow
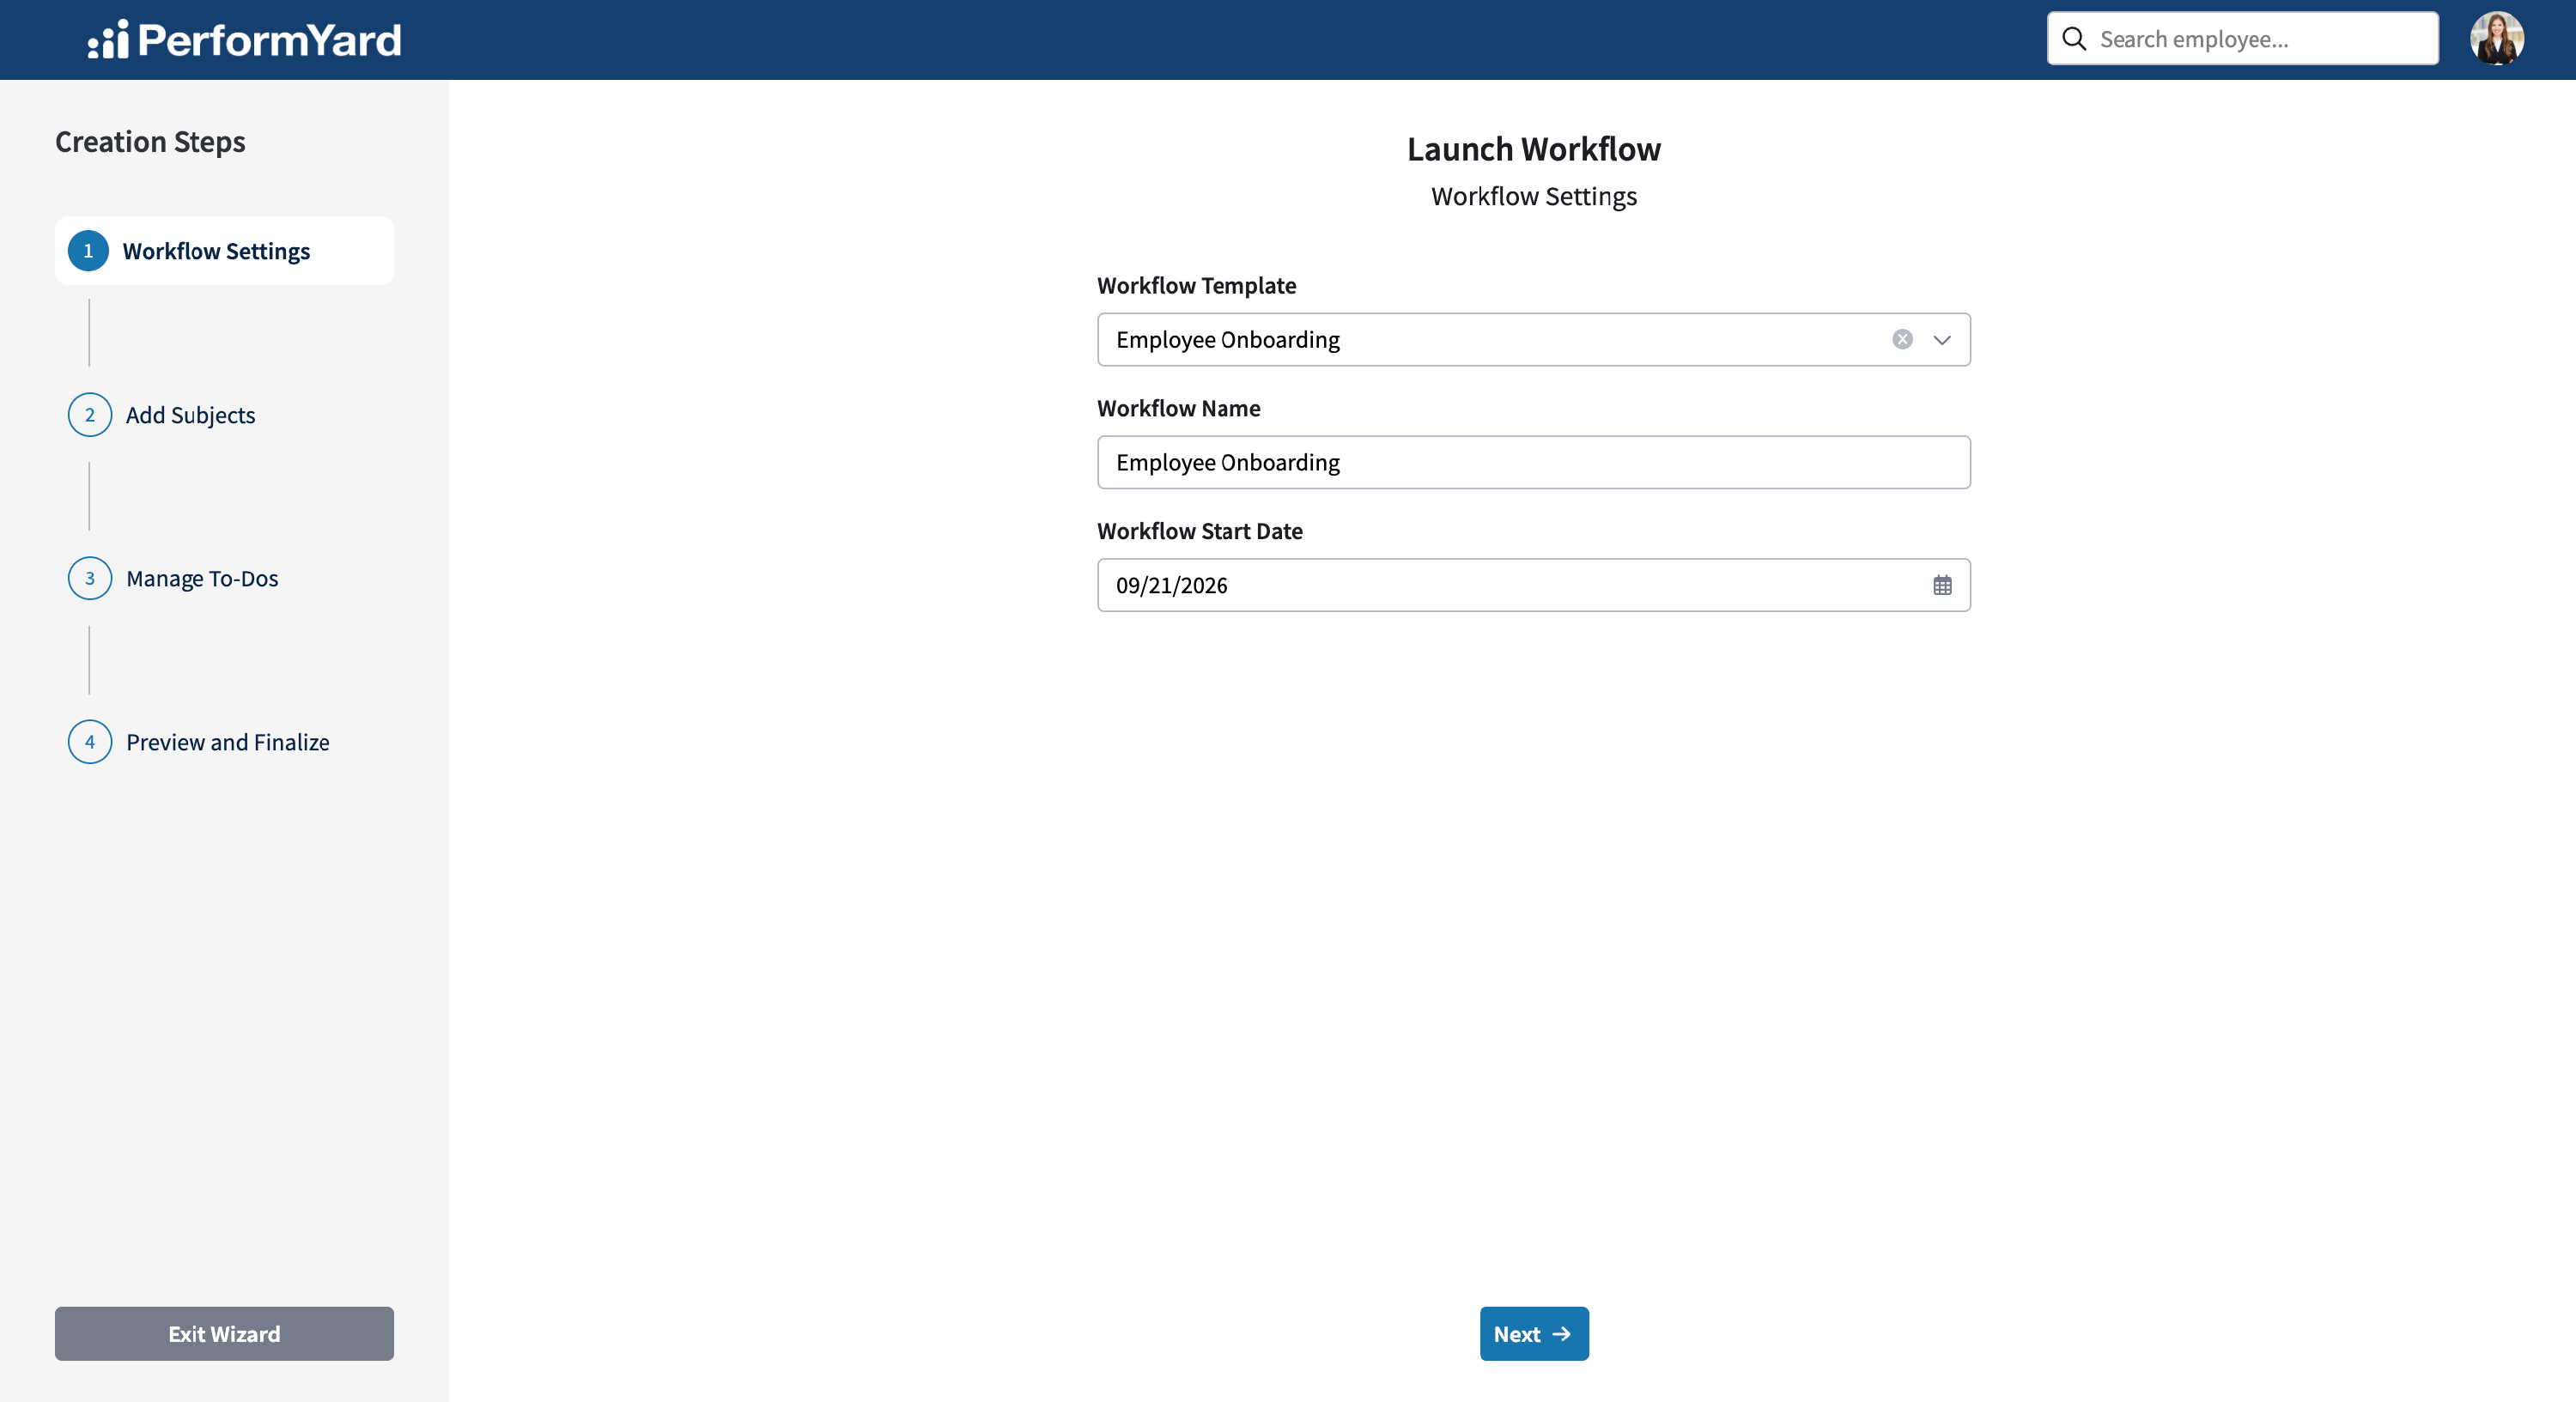
To launch a new workflow for one or more employees, click the Workflows dropdown in the navigation, click Company Workflows, and then click Launch Workflow. Here you will be prompted to define the parameters for the workflow you are launching. This includes:
- Choose a workflow template: Select the template that you want to assign.
- Workflow name: Optionally rename the workflow. This is initially pre-populated with the template name, but you can customize as necessary to describe/title the workflow.
- Start date: Select when you want the workflow to begin. Any to-do actions will not be available for users to complete until that day.
Selecting Employees
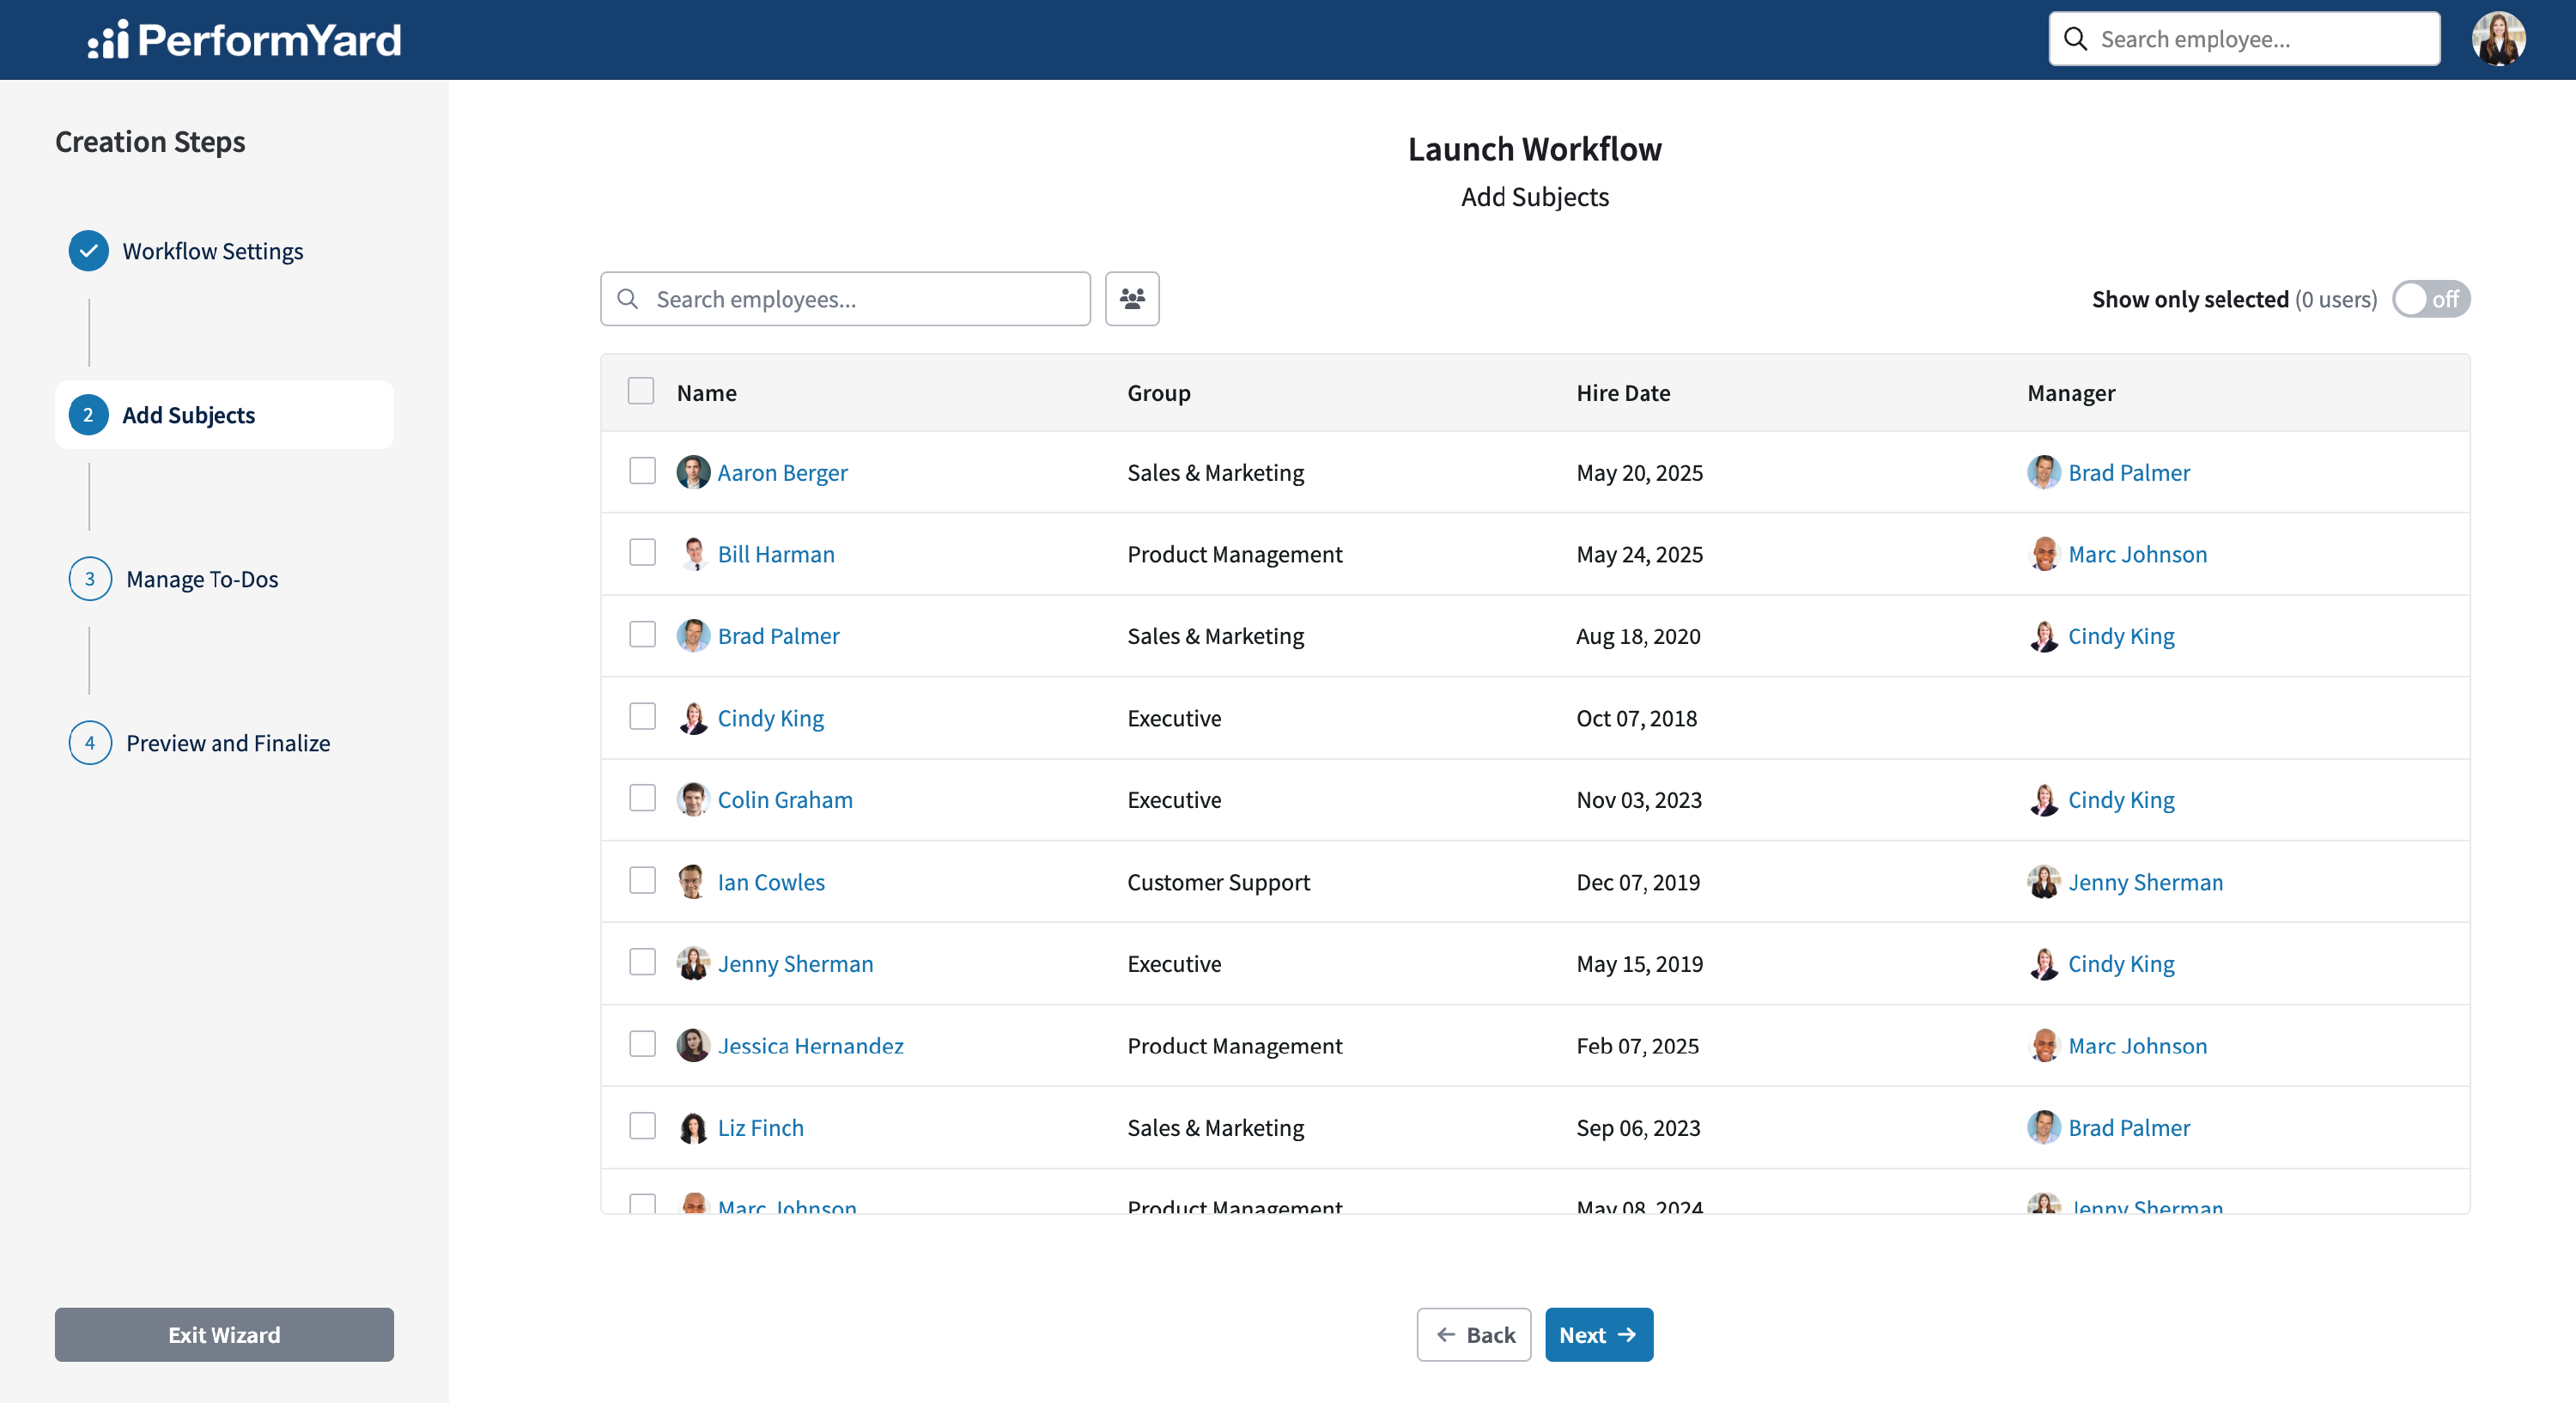
Next, choose one or more employees to whom you are assigning the workflow. Check the box to the left of each user you want to assign this workflow. Here you are selecting the Subject of the workflow. You can search for users with the search box or select all users in a group using the Groups link to the right of the search box. You may select one or more employees here.
Define To-Dos (Tasks)
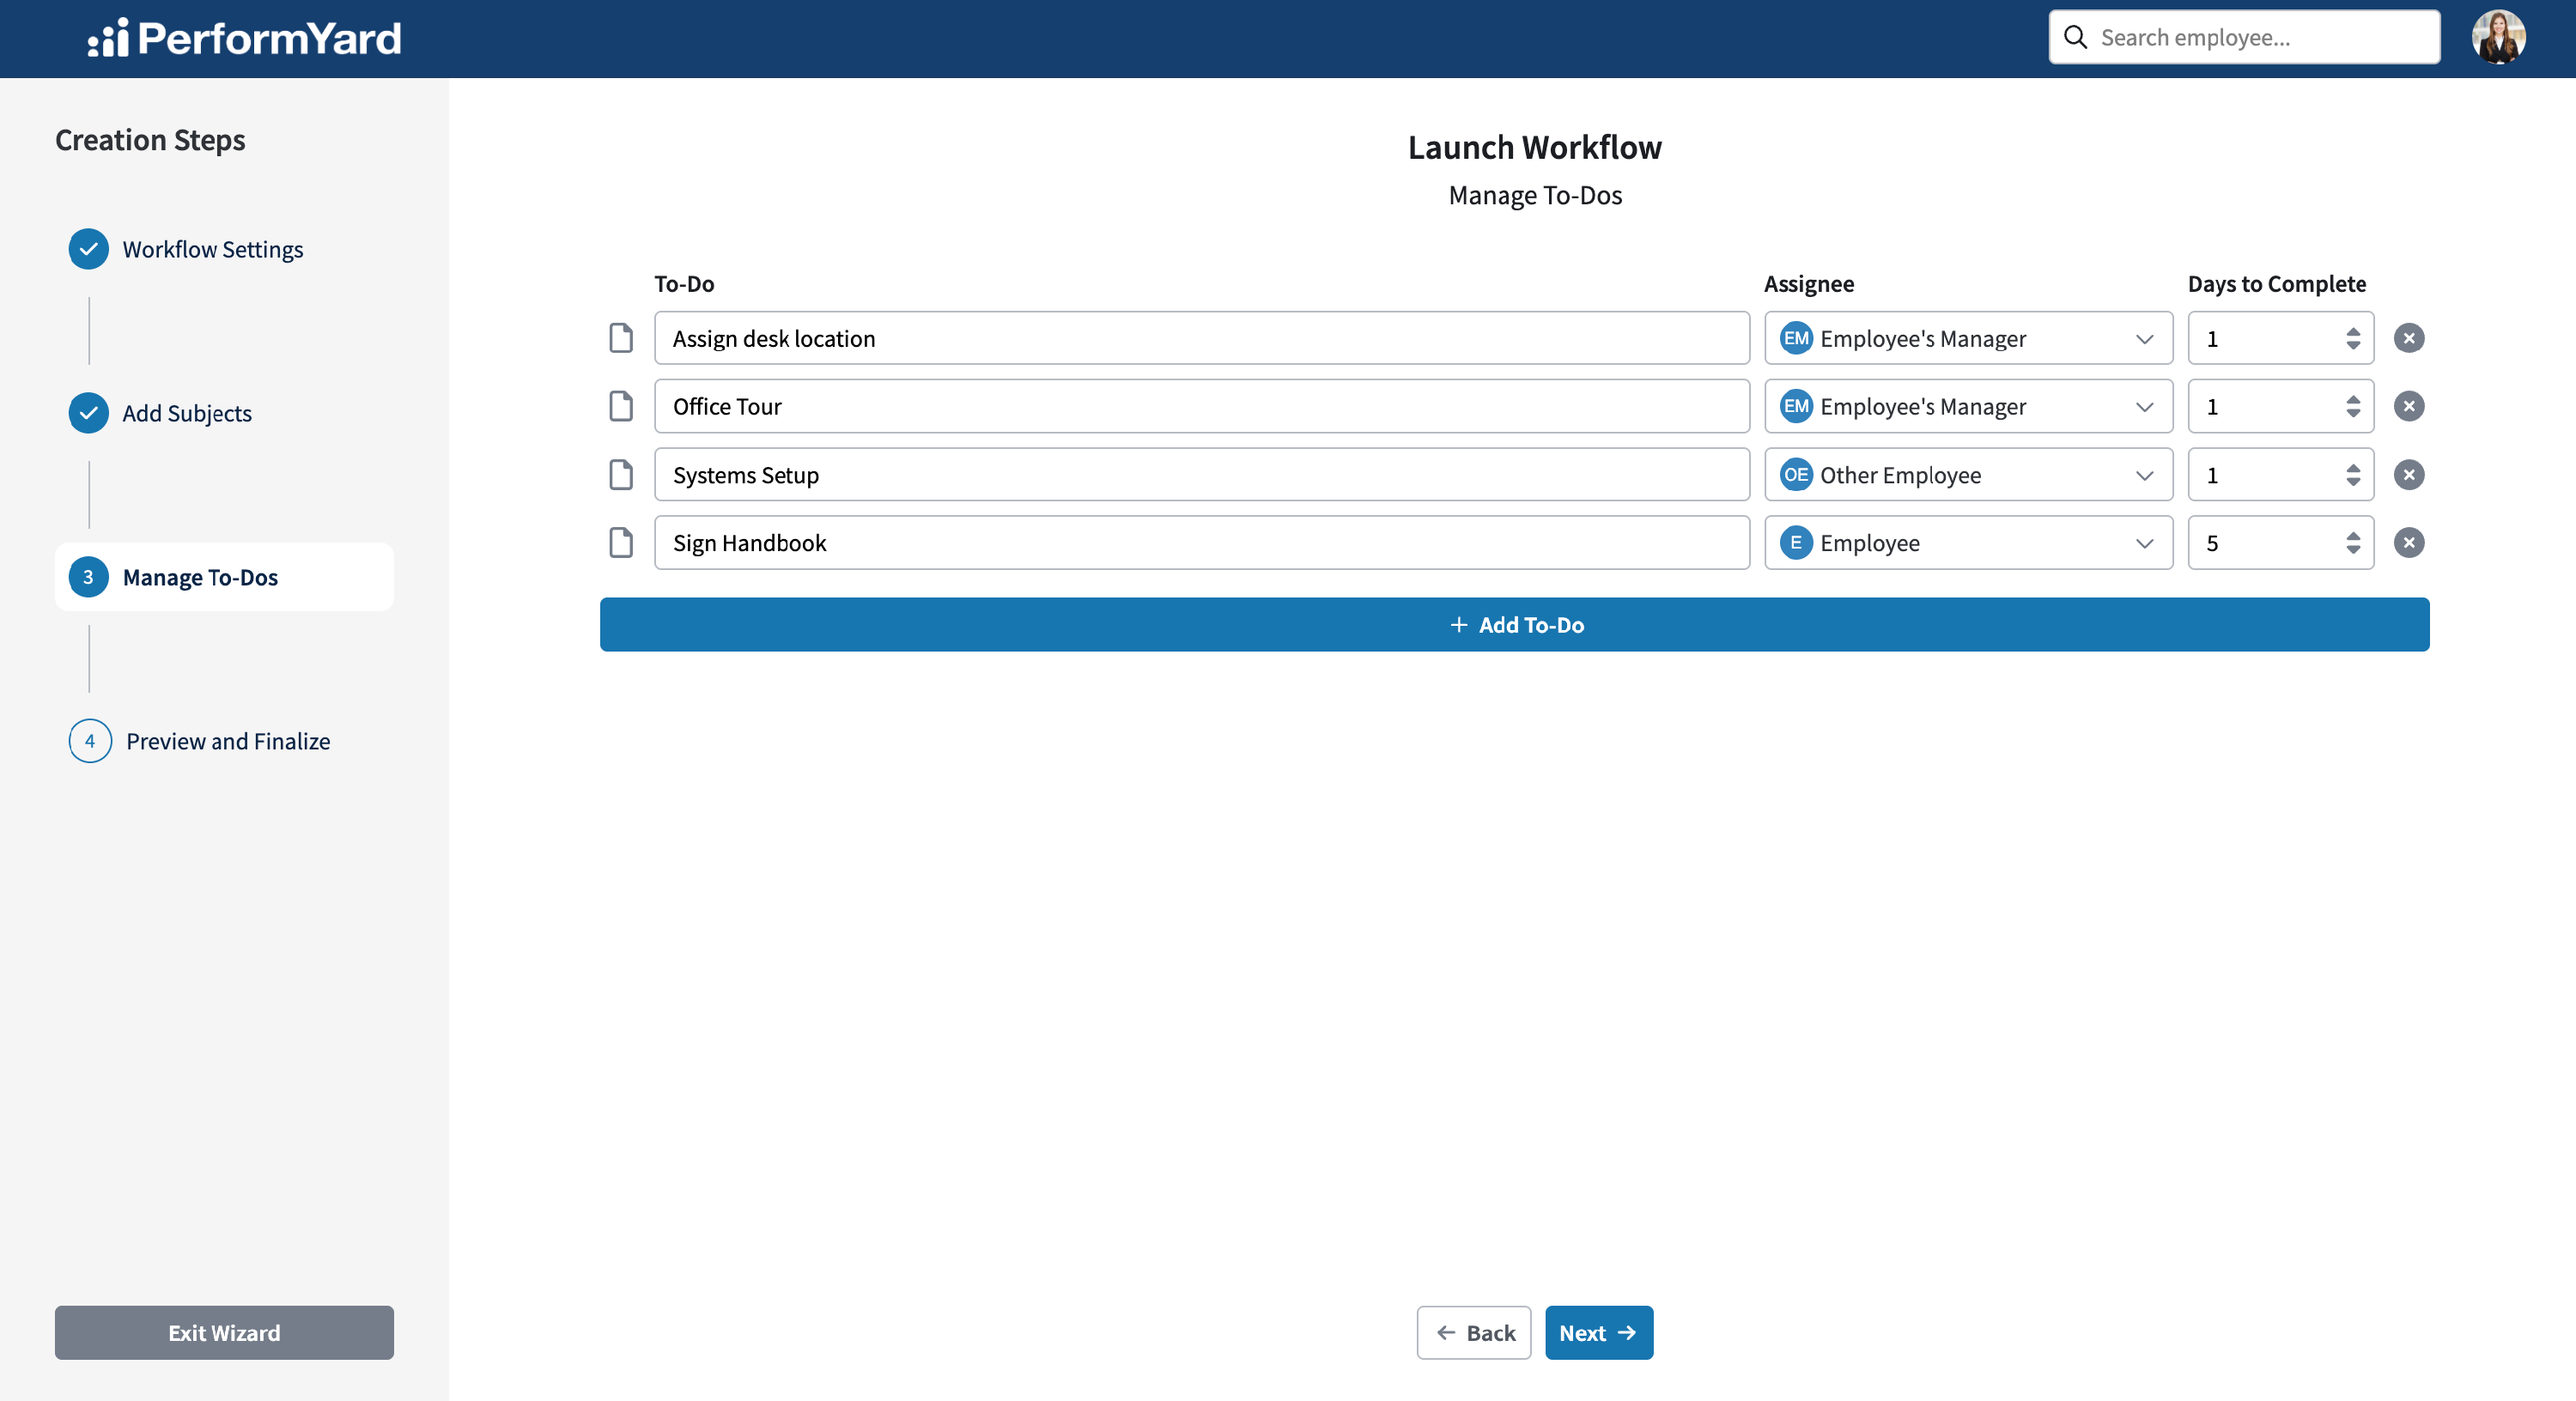
Next you will review the various to-dos and assignments in the workflow template. You can re-assign any tasks as necessary, update the days to complete or add new to-dos.
You'll also be prompted to enter who is responsible for those to-dos that were assigned as "Other Employee" in the template by locating any yellow boxes where you can make selection(s).
Preview & Assign Backup Manager
Finally you'll see a Preview and Finalize step that will recap your selections and give you an opportunity to assign a backup manager. Assigning a backup manager will only occur if your template includes any assignments for “Employee's Manager.” In the event that a workflow subject does not have a manager, the selected employee will be assigned to complete those steps. When done, click Launch Workflow.
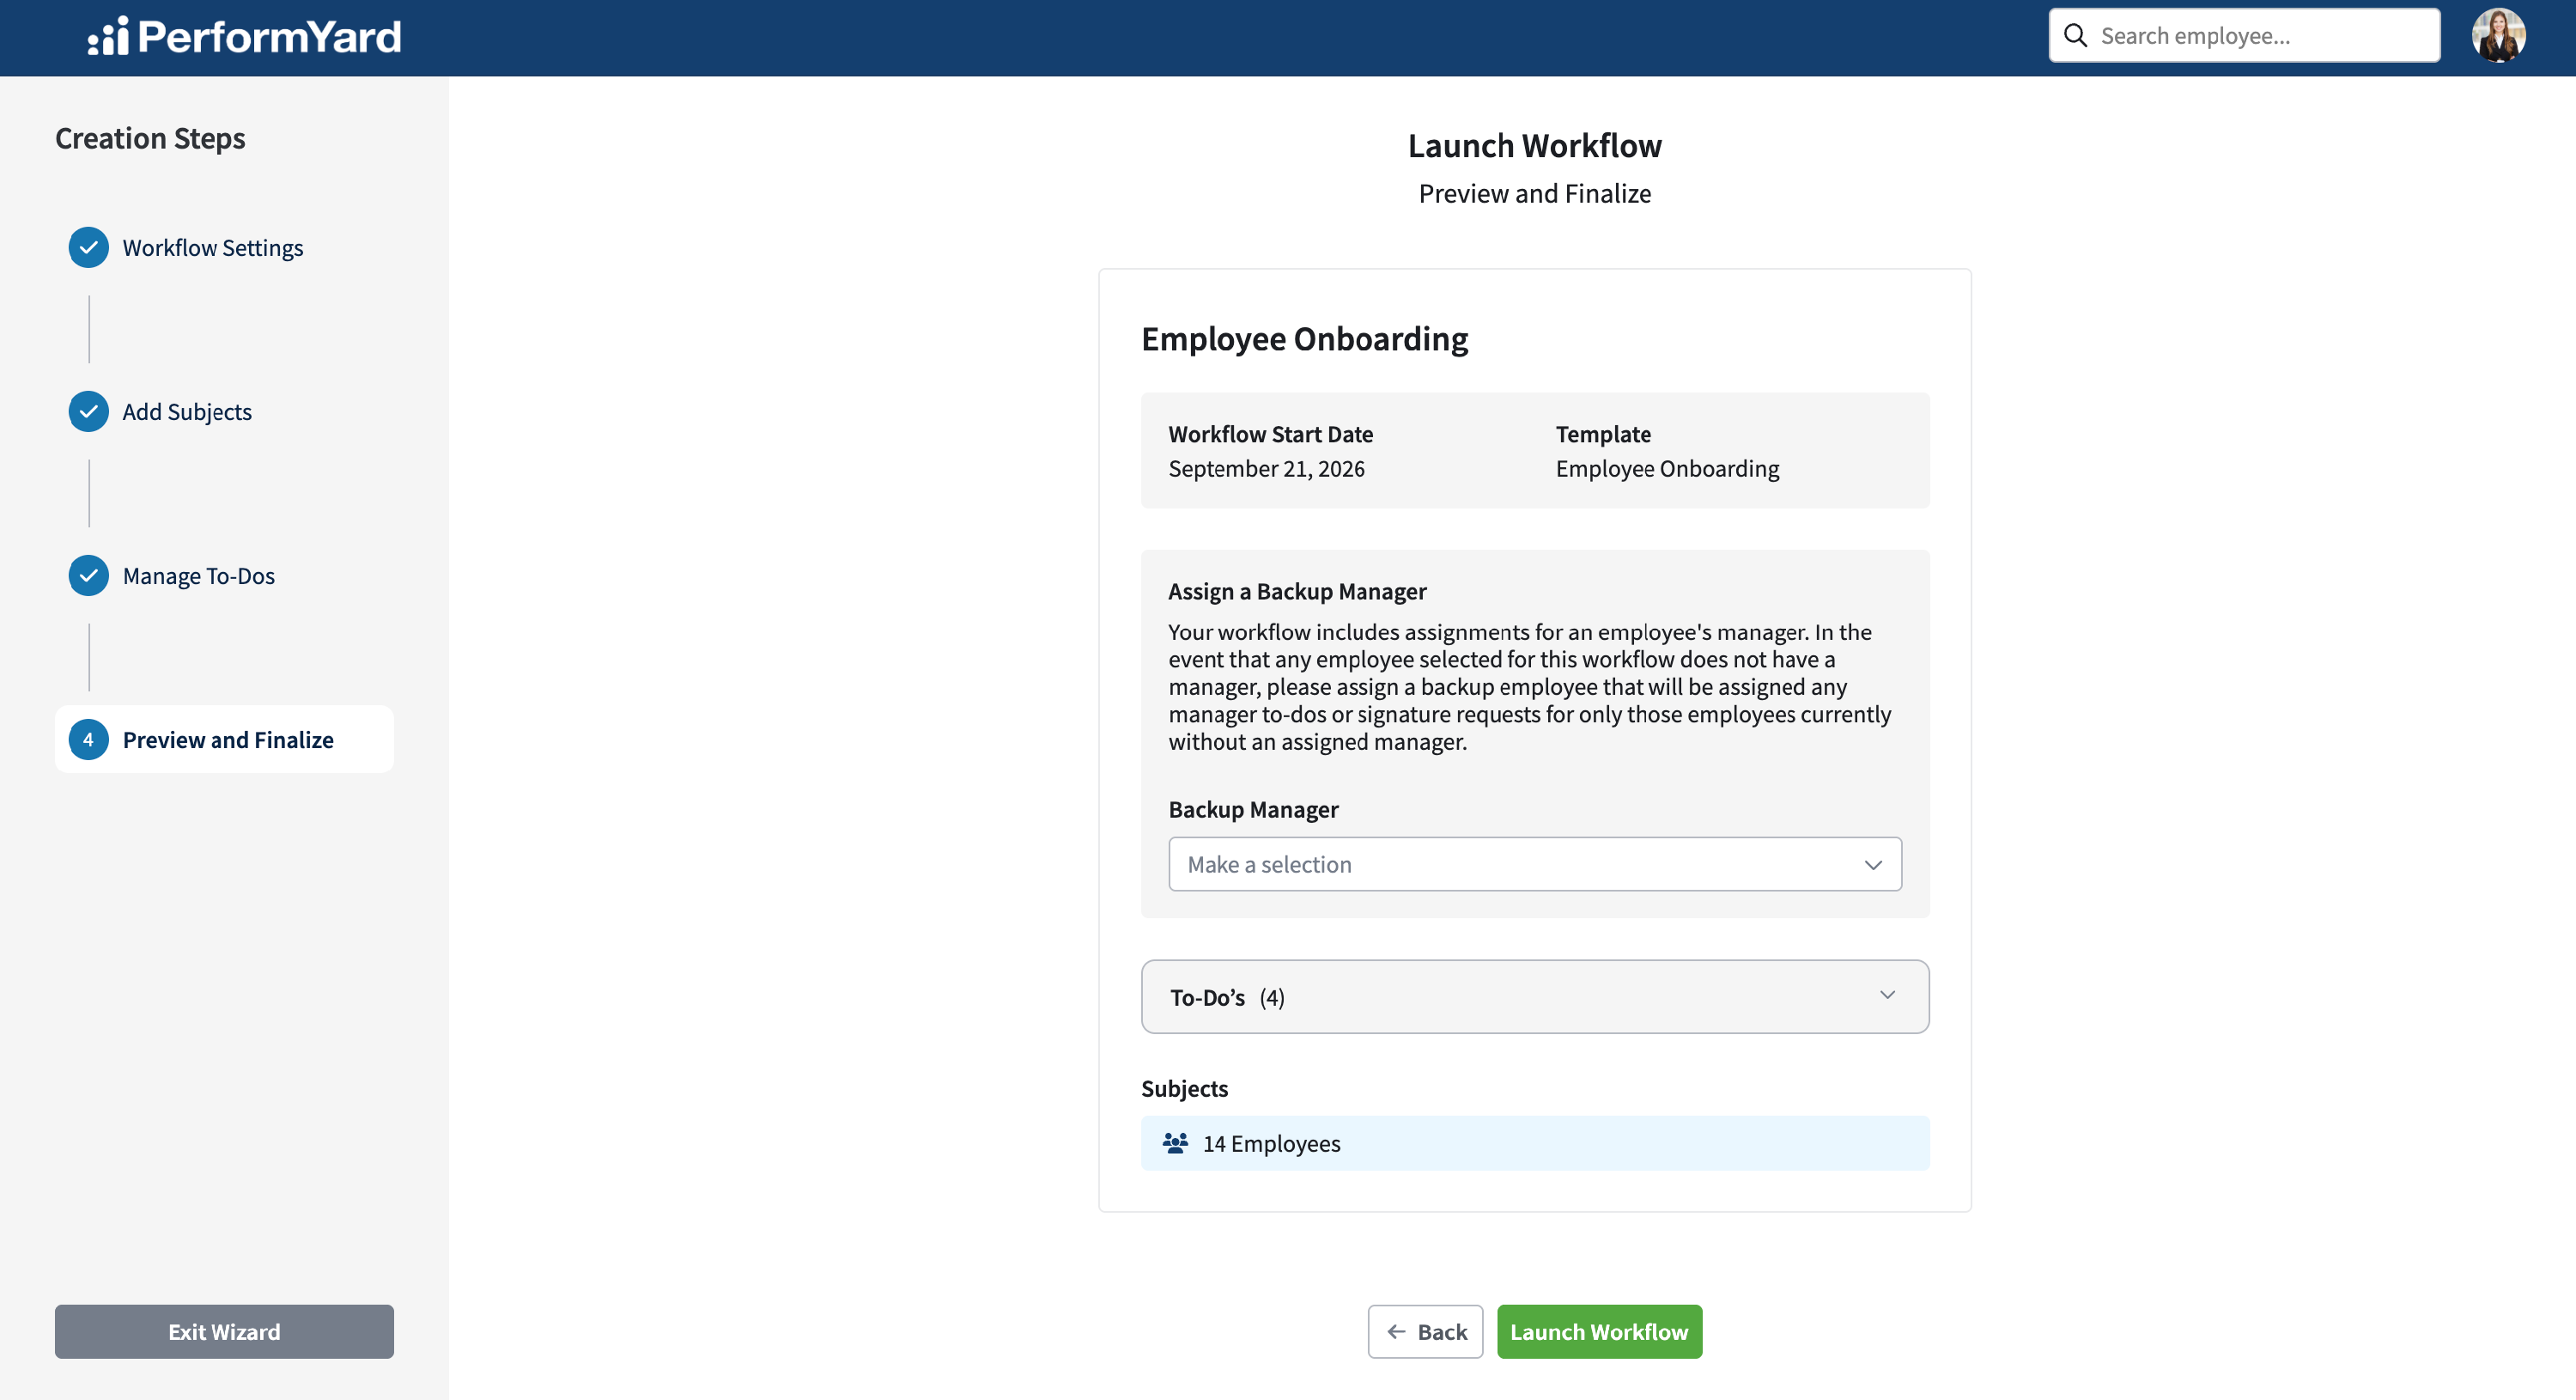
PerformYard will then assign the workflow to selected employees. A progress bar will appear to let you know those are being assigned, and you can then click Go To Workflows to return to the workflow list in Company Settings.
You will then see the details of those workflows you assigned, including the overall completion status, name of the workflow, subject and start date. From here click the name of the workflow to view its details. Here you will have the option to cancel the workflow, add new to-dos, and remove or edit existing to-dos.
Assigned To-Dos
From the Company Workflows page, you can click into any launched workflow to get an understanding of where the to-dos within stand. You'll get a high level overview of how many to dos are complete, in progress, overdue, and incomplete. From there, you can see each individual to-do, who its assigned to, its status, its due date, and if completed, the completed date.
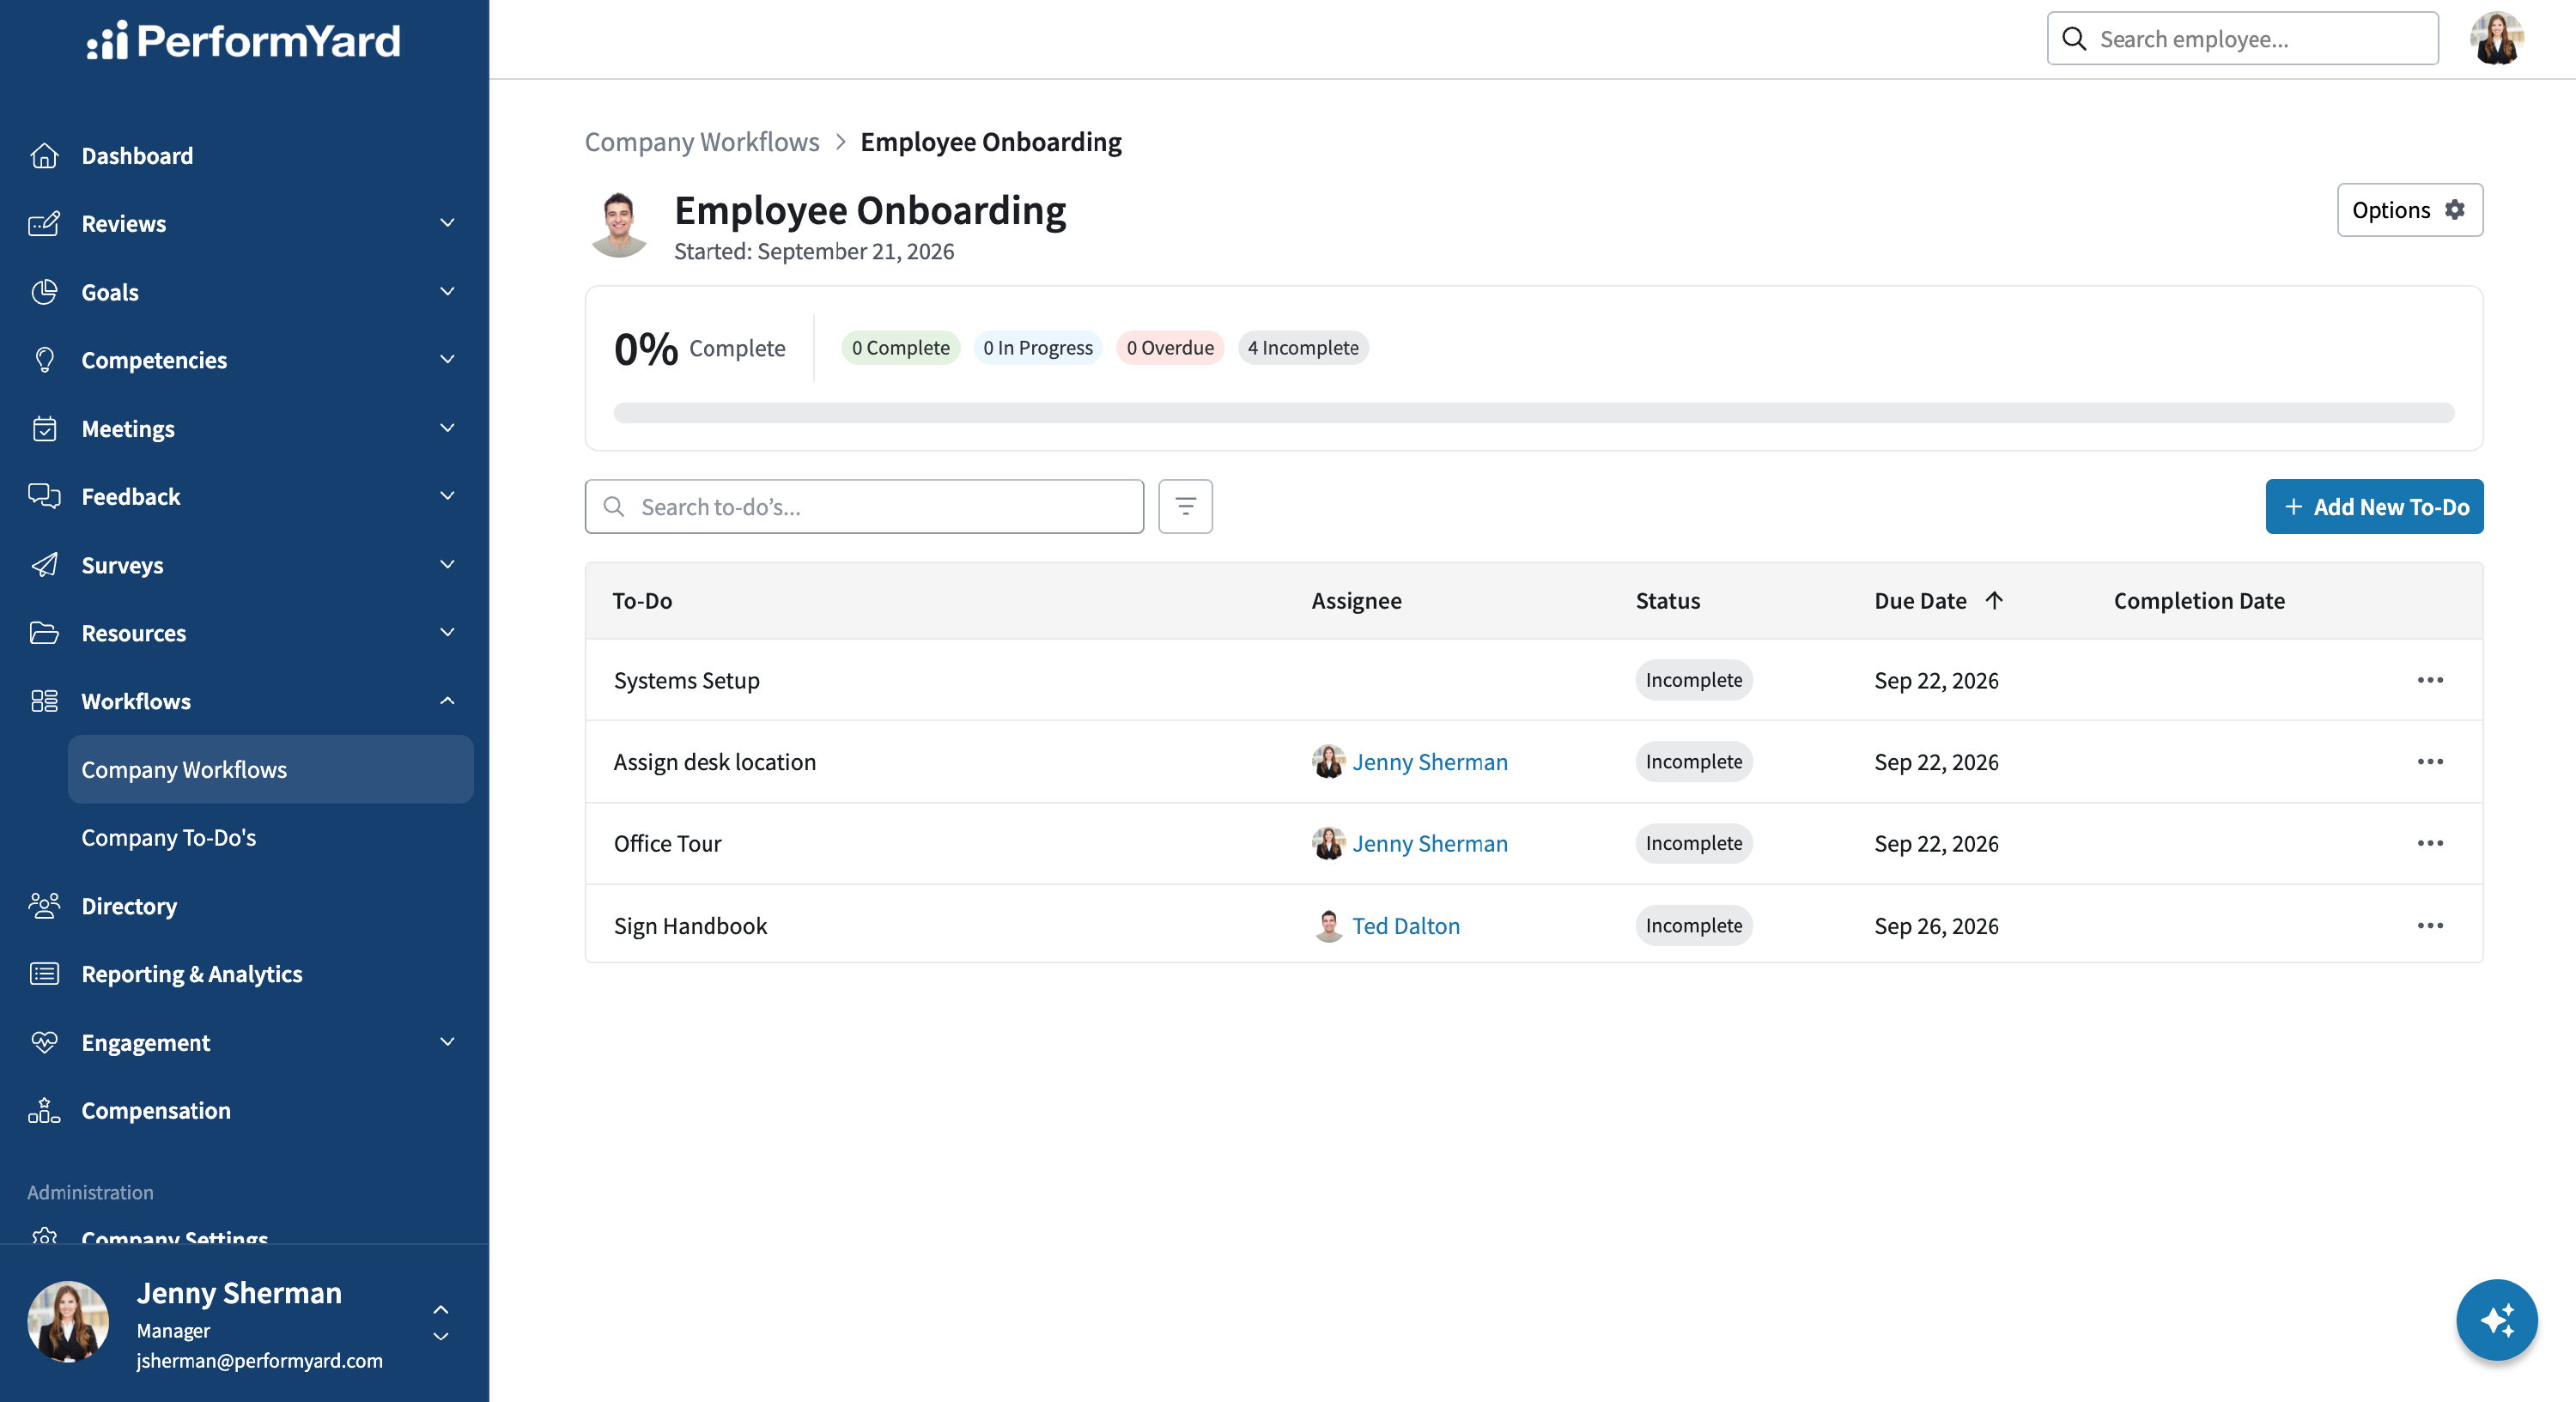
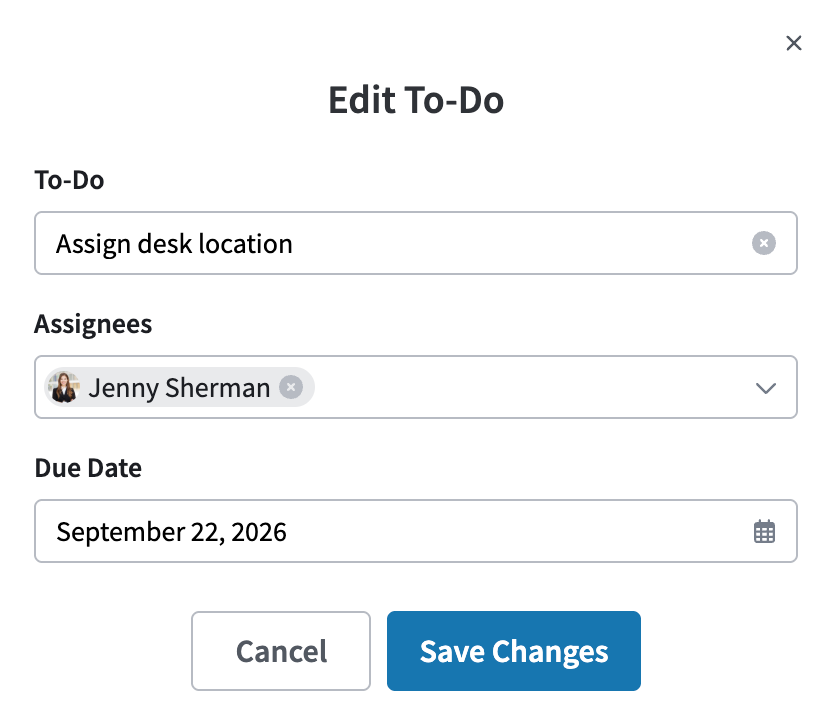
To remove or edit a to-do, use the three dots to the right of Completion Date. If you edit a to-do, you will have the option to change the to-do description, assign (or re-assign) the to-do, change the due date, and attach a document to sign. Click Update To-Do to confirm changes. Please note that to-do's with signature request templates that have multiple signers are unable to be edited, they can only be removed.